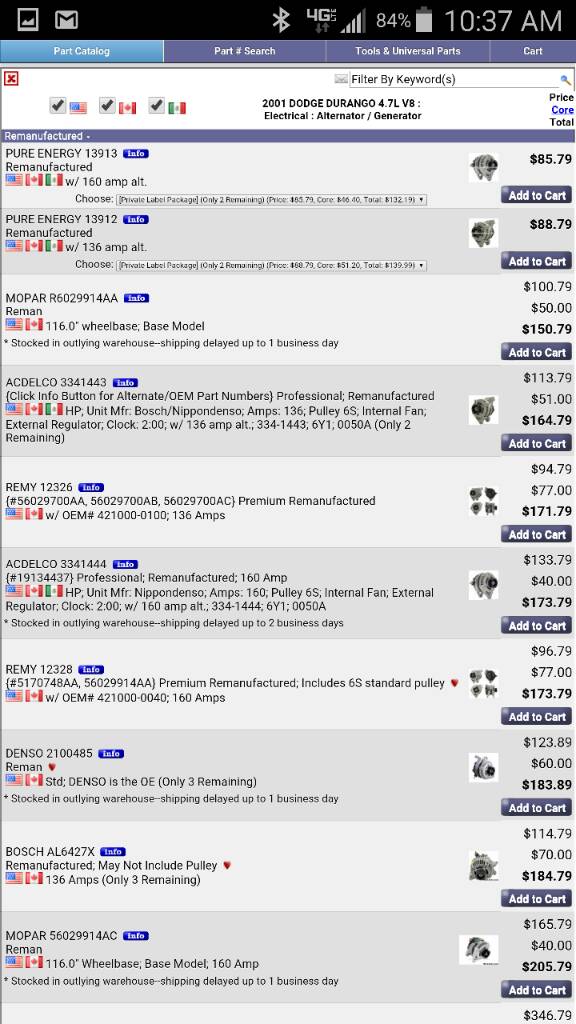
Well it was time for a new alternator, so I started looking at options. First thought was just the 137A from the ZJ, but I didn't like needing to rewire anything to match the terminals on the back of the alternator. When I looked at the Durango version, the plugs matched my 99, so that made it a better option. Added bonus is that the Durango 137A was about $40 cheaper than the ZJ version, and the 160A was only about $5 more than the 137A. So, 160A it was.
I am creating this thread as there was no good setp-by-step thread of the install, showing what fit and what doesn't and what needs to be modified to get it in.
The box -

Here are the differences between the stock and Durango units -
The rear -

Close up of the output stud. The stock terminal will NOT fit unless you drill it. However, I do not recommend using the stock wiring. A 3/8" ring terminal fits.

The front -
The overall size is very close. It took less than 5 minutes with a die grinder to clearance the bracket on the block to get it to fit. Sorry, no pics of that part. I installed the top bolt, then kept grinding and test fitting until I could go past the lower hole so I knew there would be an air gap all the way around.

The pulley -
The Durango pulley is larger diameter and has an extra rib. The extra rib is fine, but I didn't like that it would be spinning slower. So, I swapped the pulleys between the units.

The charge wire -
Yes, I didn't follow my own advice. I am building new cables for it but needed to get it back on the road so I made a temporary tweak. Since I don't have any loads that are larger than stock, I should be OK for a week or two. I used a unibit to enlarge the hole in the stock charge wire.

Front bracket -
Something that I haven't seen anyone mention here is the front bracket. The ribs are higher on the front of the Durango unit, so some clearancing needs to be done. This was done with a cutoff wheel on my die grinder.

All mounted up -
Here it is in place.

Been running it for a week and everything is working great. With the old alternator, when my fan would kick on my volt gauge would dip for a few seconds. Now, it holds rock steady at an indicated 14v on my stock gauge no matter what I turn on.
It really was a very easy swap.
I am creating this thread as there was no good setp-by-step thread of the install, showing what fit and what doesn't and what needs to be modified to get it in.
The box -
Here are the differences between the stock and Durango units -
The rear -
Close up of the output stud. The stock terminal will NOT fit unless you drill it. However, I do not recommend using the stock wiring. A 3/8" ring terminal fits.
The front -
The overall size is very close. It took less than 5 minutes with a die grinder to clearance the bracket on the block to get it to fit. Sorry, no pics of that part. I installed the top bolt, then kept grinding and test fitting until I could go past the lower hole so I knew there would be an air gap all the way around.
The pulley -
The Durango pulley is larger diameter and has an extra rib. The extra rib is fine, but I didn't like that it would be spinning slower. So, I swapped the pulleys between the units.
The charge wire -
Yes, I didn't follow my own advice. I am building new cables for it but needed to get it back on the road so I made a temporary tweak. Since I don't have any loads that are larger than stock, I should be OK for a week or two. I used a unibit to enlarge the hole in the stock charge wire.
Front bracket -
Something that I haven't seen anyone mention here is the front bracket. The ribs are higher on the front of the Durango unit, so some clearancing needs to be done. This was done with a cutoff wheel on my die grinder.
All mounted up -
Here it is in place.
Been running it for a week and everything is working great. With the old alternator, when my fan would kick on my volt gauge would dip for a few seconds. Now, it holds rock steady at an indicated 14v on my stock gauge no matter what I turn on.
It really was a very easy swap.