Markos
NAXJA Forum User
- Location
- Seattle, WA
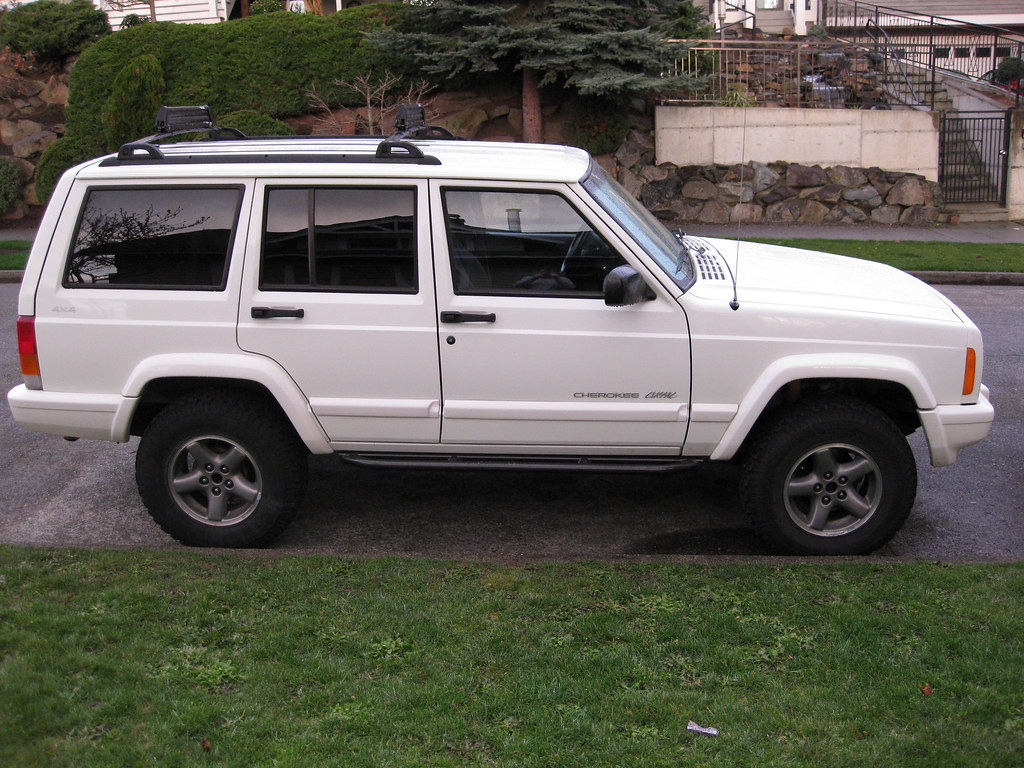
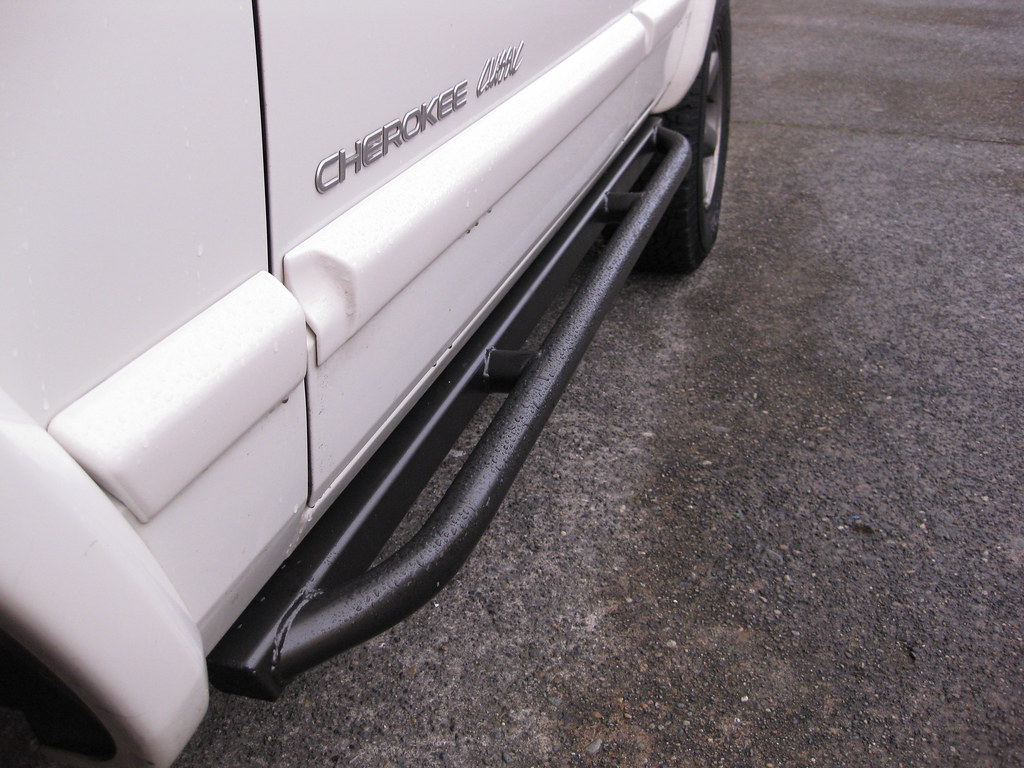
First off, I love the rails. High quality, and straigther than a factory XJ will ever be.
I just wanted to post a message about this since this install is generally considered easy by most. I'd agree that there is nothing particuarly challenging about Rock Rail installation.
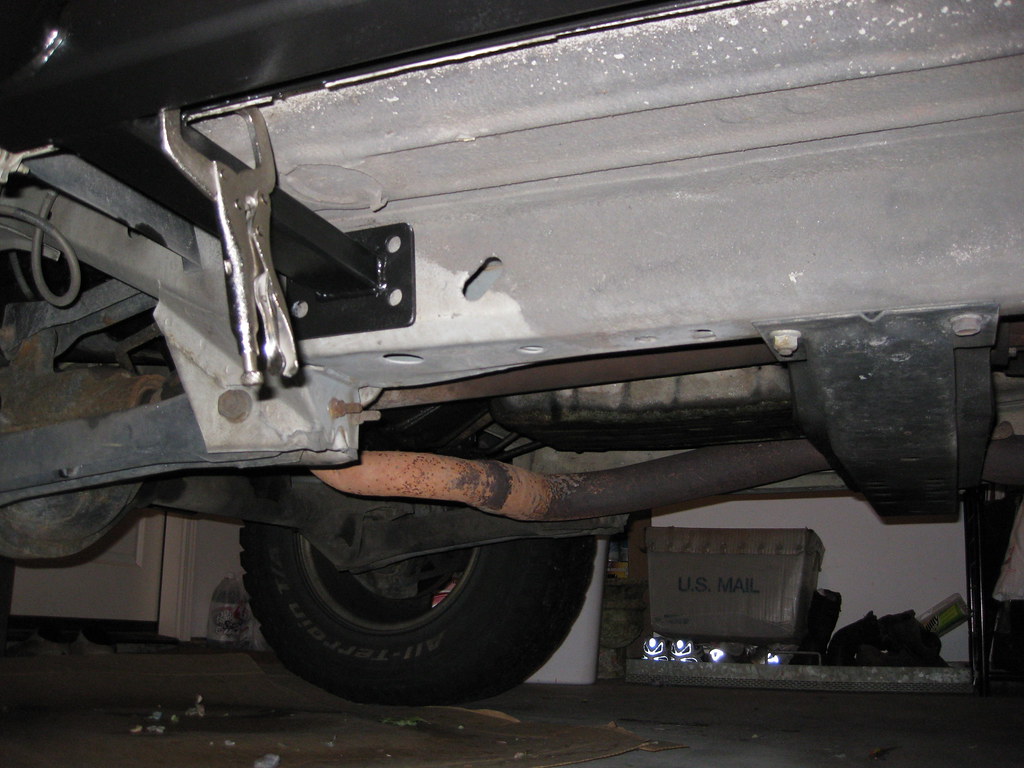
I expected this to take 2-3 hours, but it ended up being more like six. The first rail went on fine for the most part. I followed AJ's advice and used vice grips to hold the rail in place. This worked suprisingly well. Having you typical box of drill bits, I didn't realize that I was missing the critical 21/64th drill bit. That was my first trip to Lowes. I decided to drill the holes with the rails mounted, and I thought this worked quite well. You have to be careful with the pinch seam holes since you are eyeballing it and drilling it from the inside out.
My first problem came when I snapped my 21/64th drill bit on the last hole of the first rail. I switched over to the pinch seam holes, which somehow killed my HF drill (big suprise). My next trip to Lowes included two more 21/64th bits (just in case), along with a new drill.
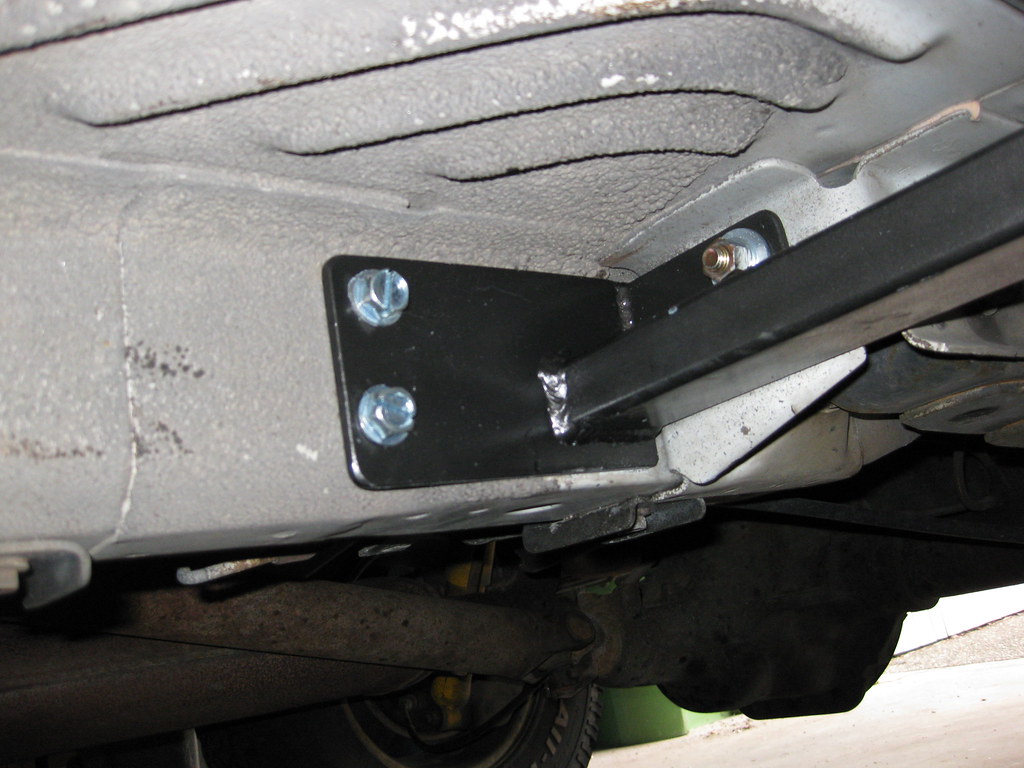
I decided to follow the instructions on the second rail, by mountin the rail first, marking the holes, and removing for the drilling process. I gave up drilling the frame holes because the bit seemed dull as heck. I discovered that my new 21/64th hitachi bit was actually a 5/16th bit. The fun part is that the package was correct. I think they repackaged a dull 5/16th bit in the 21/64th package. Luckily, I bought two new bits.
Removing the rail made it easier to drill, but I found that some of my frame rail holes didn't line up. I planned on sticking with my original method by my replacement drill was much too large to fit in the small space. I managed to get all the nutserts in without stripping any. Ultimately, I got all the bolts in and the rails lined up, only missing one pinch seam bolt. I need to get at that one with a replacement low profile drill.
So somehow this turned into an annoying 6 hour job, a chunk of that time spent at Lowes. I'll post some pics later...
I just wanted to post a message about this since this install is generally considered easy by most. I'd agree that there is nothing particuarly challenging about Rock Rail installation.
I expected this to take 2-3 hours, but it ended up being more like six. The first rail went on fine for the most part. I followed AJ's advice and used vice grips to hold the rail in place. This worked suprisingly well. Having you typical box of drill bits, I didn't realize that I was missing the critical 21/64th drill bit. That was my first trip to Lowes. I decided to drill the holes with the rails mounted, and I thought this worked quite well. You have to be careful with the pinch seam holes since you are eyeballing it and drilling it from the inside out.
My first problem came when I snapped my 21/64th drill bit on the last hole of the first rail. I switched over to the pinch seam holes, which somehow killed my HF drill (big suprise). My next trip to Lowes included two more 21/64th bits (just in case), along with a new drill.
I decided to follow the instructions on the second rail, by mountin the rail first, marking the holes, and removing for the drilling process. I gave up drilling the frame holes because the bit seemed dull as heck. I discovered that my new 21/64th hitachi bit was actually a 5/16th bit. The fun part is that the package was correct. I think they repackaged a dull 5/16th bit in the 21/64th package. Luckily, I bought two new bits.
Removing the rail made it easier to drill, but I found that some of my frame rail holes didn't line up. I planned on sticking with my original method by my replacement drill was much too large to fit in the small space. I managed to get all the nutserts in without stripping any. Ultimately, I got all the bolts in and the rails lined up, only missing one pinch seam bolt. I need to get at that one with a replacement low profile drill.
So somehow this turned into an annoying 6 hour job, a chunk of that time spent at Lowes. I'll post some pics later...