• Welcome to the new NAXJA Forum! If your password does not work, please use "Forgot your password?" link on the log-in page. Please feel free to reach out to [email protected] if we can provide any assistance.

Bolt In High Pinion Dana 44

Starboard M

NAXJA Member
NAXJA Member
Location
Lafayette, CA
Introduction

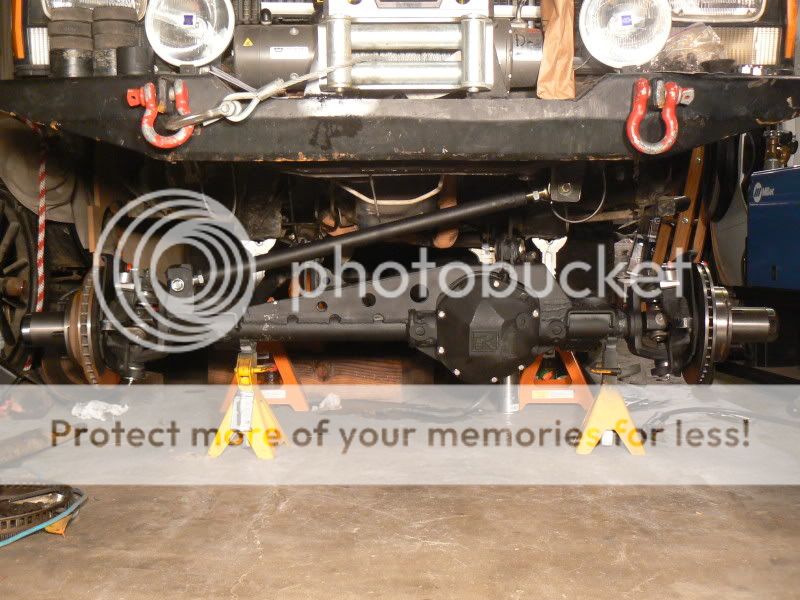
Over the last four years I have been in the process of building a front high pinion Dana 44 for the front of my XJ. I thought some would like a write up on how I ended up narrowing a high pinion Ford 44 down to Waggy width and added all the bling.

Some might question why build a high pinion Dana 44 when you can build a Dana 60 for just a little bit more, and gain so much more strength.

For one, my Jeep is only on 35’’ MTRs. Second, I was able to keep a Dana 30 disconnect shaft with 260 joints alive locked for 3 years, so I figure a fully polished 44 should work for me. I will most likely never go above a 37’’ tire anytime soon, so a 60 is a bit big for my needs.

My Dad was also looking into building up his front Dana 30, and I decided it would be a good time to upgrade since he wanted most of the same parts I had in mine. Lets just say, he got one heck of a deal on all my old parts.

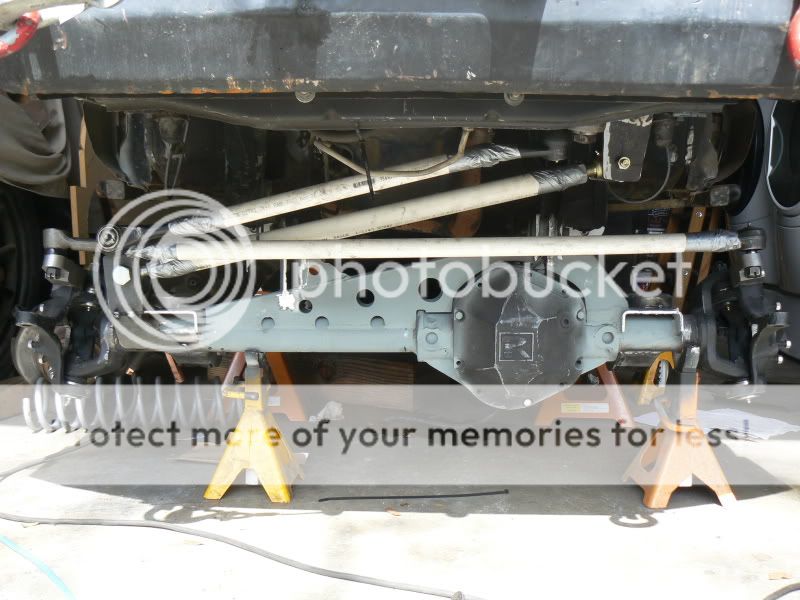
Other basic info on the Jeep: 1989 Jeep Cherokee, Renix I6, AW4, NP 231 with 4low, 2low and AA SYE, rear XJ 44 with a Detroit and 33 spline shafts, 35’’ Goodyear MTRs, and 6.5’’ of lift with TnT Y link radius arms.

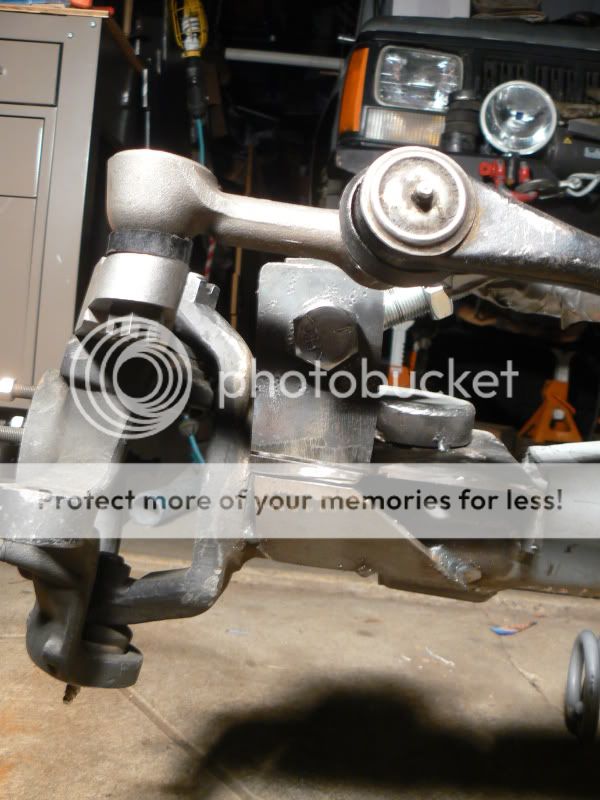
At the end, the Dana 30 had: Alloy USA shafts, Detroit locker, BTF diff cover, and JCR OTK steering.

Dana 44
One of the hardest parts was finding the right axle. I had been reading countless threads about which axle to use, ranging from a 1971 to 1979 from F100s, F150s and Broncos. After a lot of correspondence with people who had built hp44s, and finally being shown Mr. N's Dana 44 Solid Front Axle page, I narrowed my search to a 1971 to 1976 F100 axle.

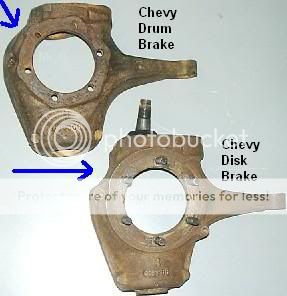
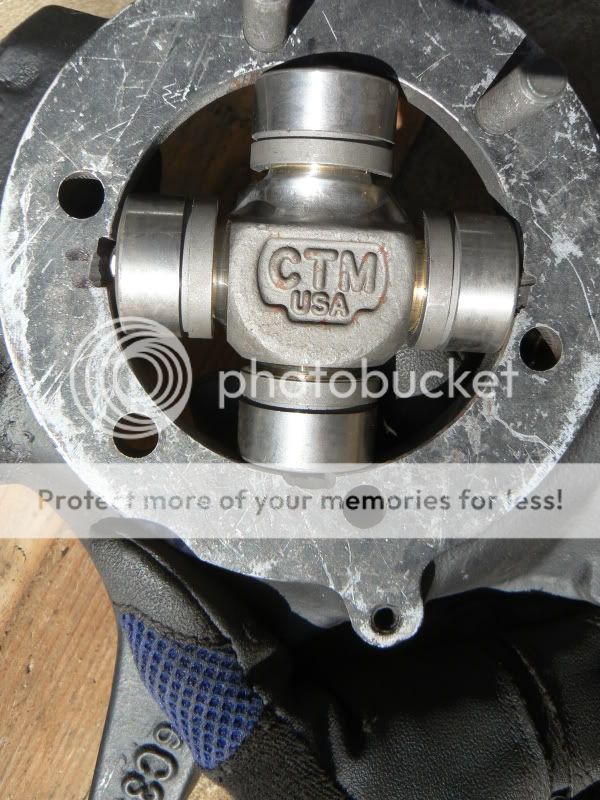
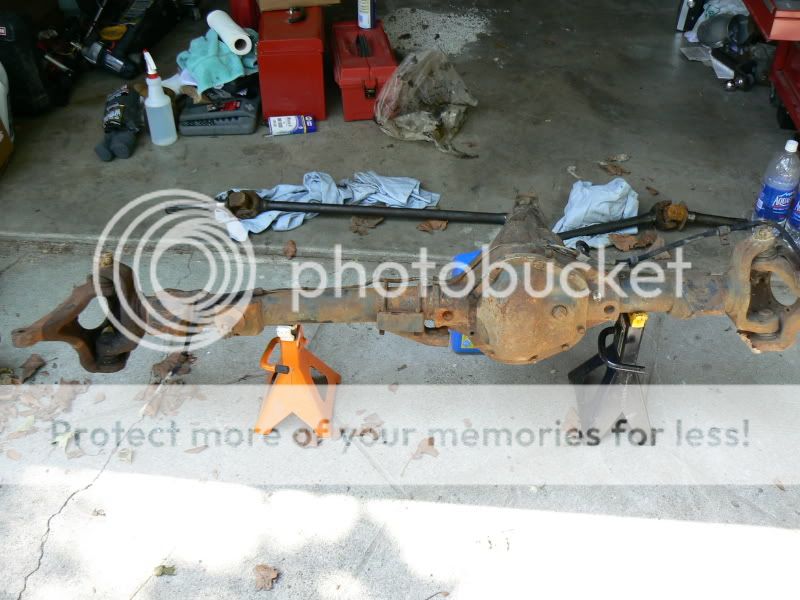
I finally found a late 1970’s Bronco axle on Craigslist and emailed the guy asking what exactly he had. I came to find that he had two 44s. One, which was a later ‘70s axle which was semi complete with disk brakes, and another which was an early ‘70s 44 that was bare and originally came with drum brakes. I took the second as it was cheaper and I had no use for the outers as I would be replacing them anyways. The guy also gave me a bunch of extra shafts, and a 10 bolt. None of which I wanted, but I figured I might be able to use the parts.

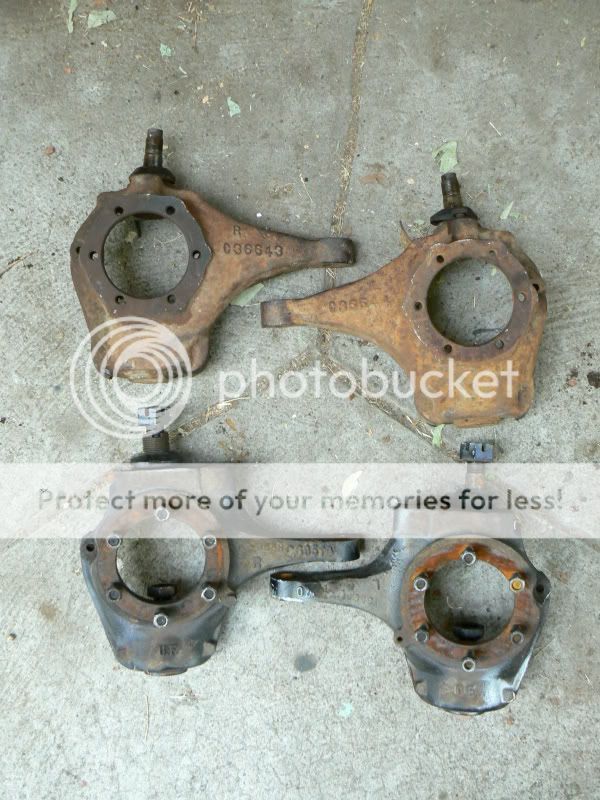
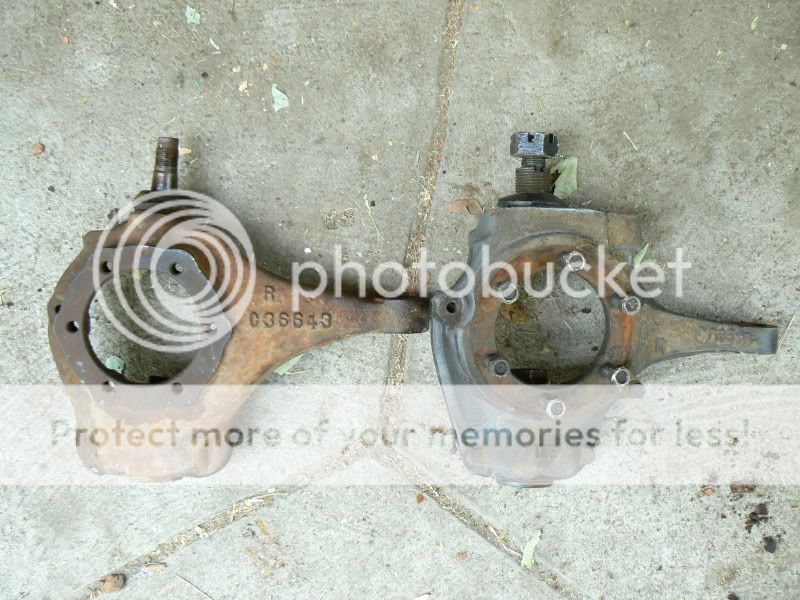
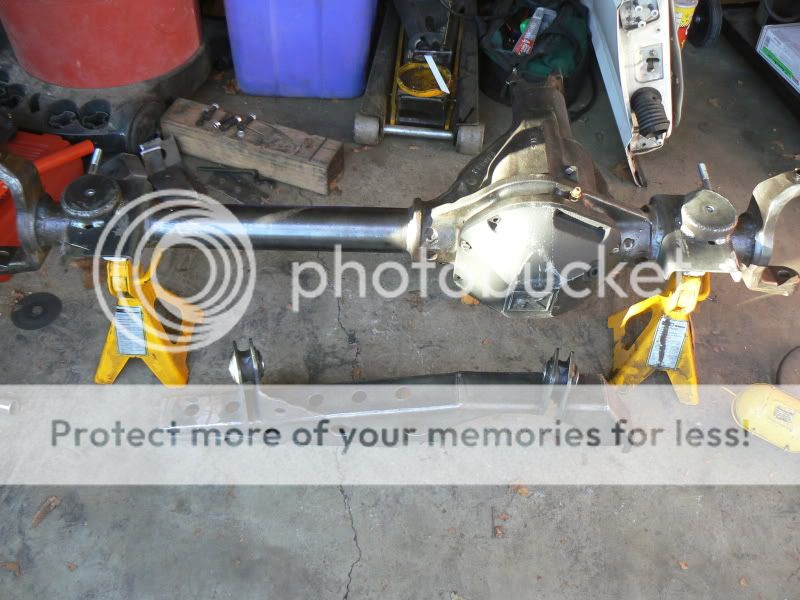
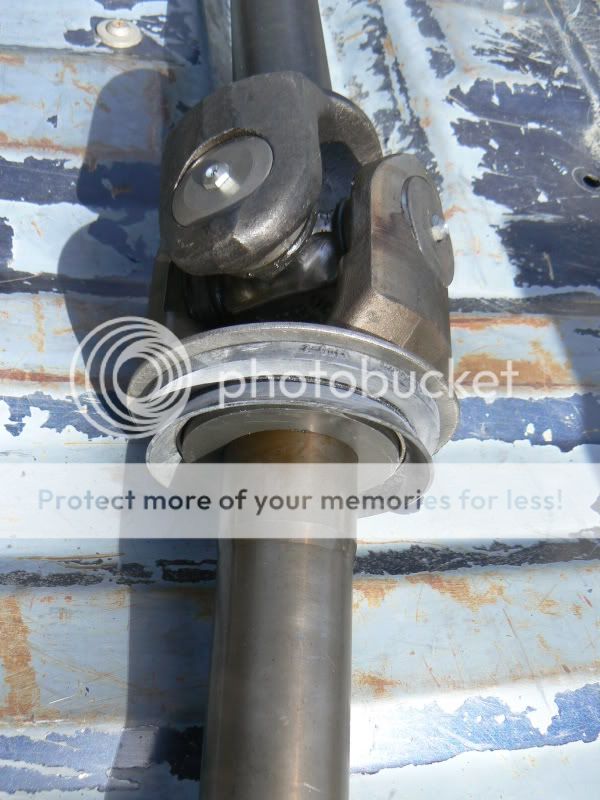
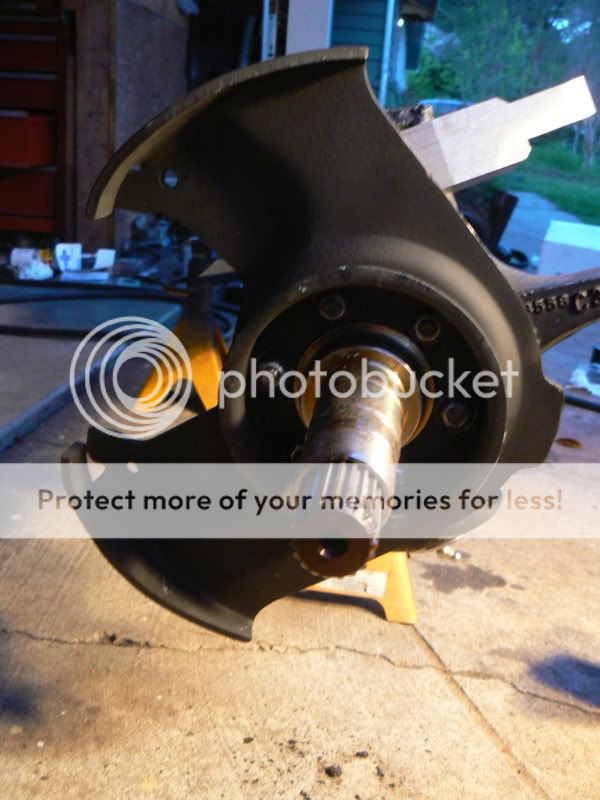
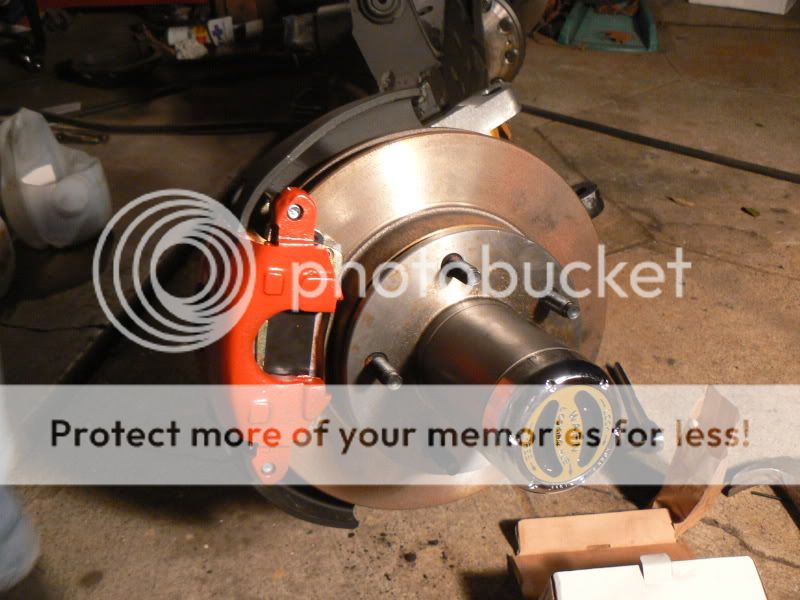
This is what I came home with:
P1010253.jpg


I was thankful I passed on the more expensive axle when I came across Cruzin Illusion’s build , where he expressed his disappointment at buying a disked 44.


Fast forward a year and a half, and I finally started working on the axle.

Tech!!
Cutting wedges
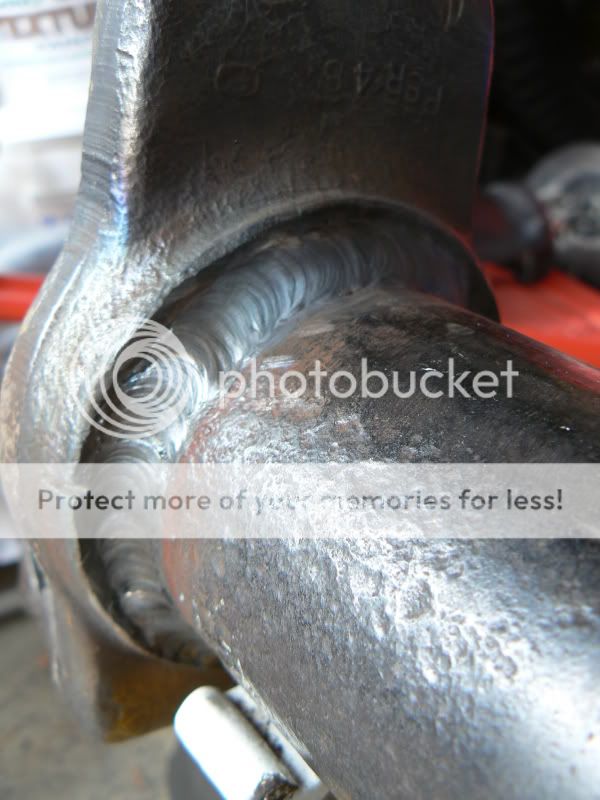
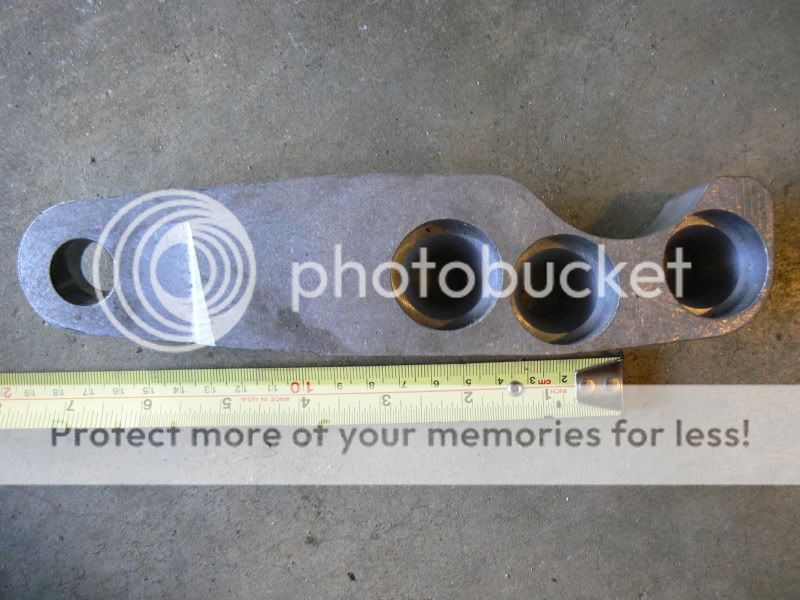
The main reason people want the pre ’78 axles is the wedges the factory radius arms mount to are welded onto the tube, rather than cast into the tubes like the ’78 and ’79 axles.

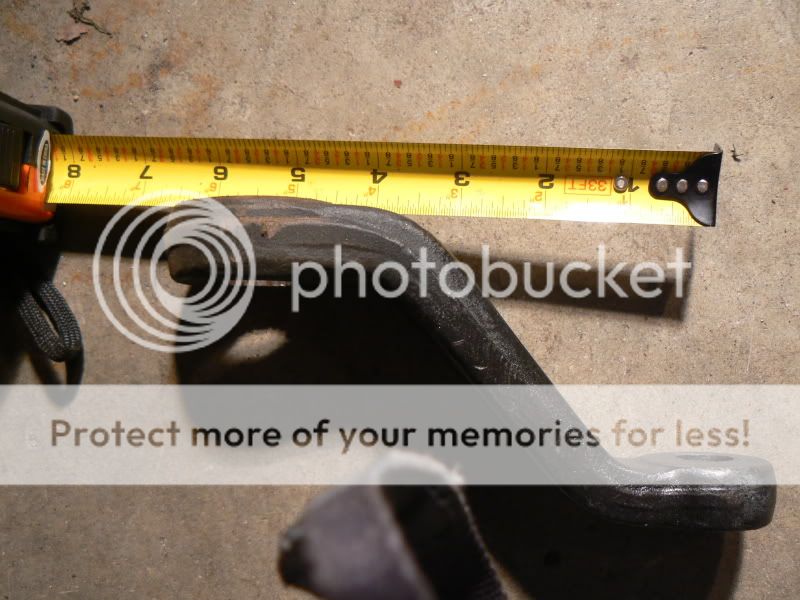
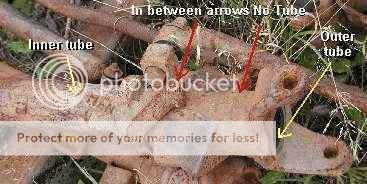
These pictures are borrowed from Mr. N, and shows the later cast wedges.
78-79tubesandcoilmountpaint2.jpg


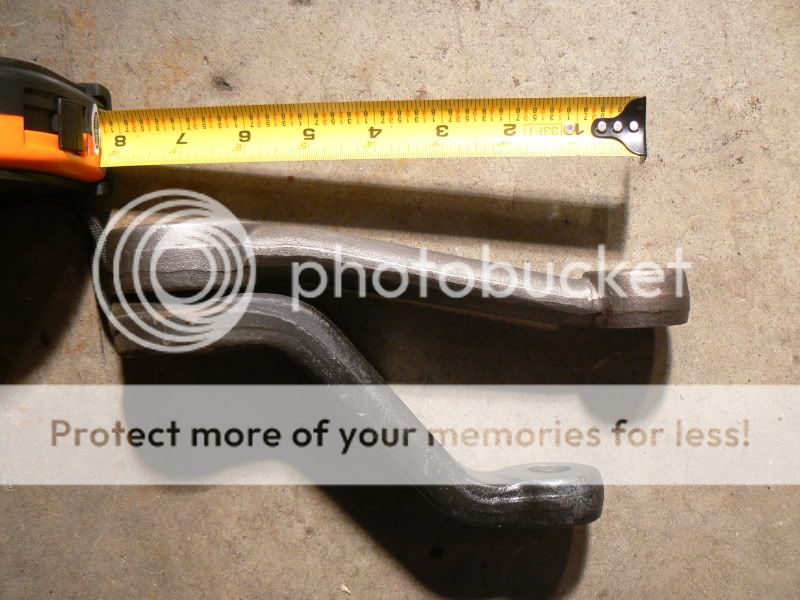
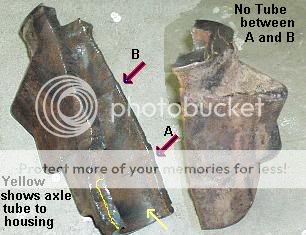
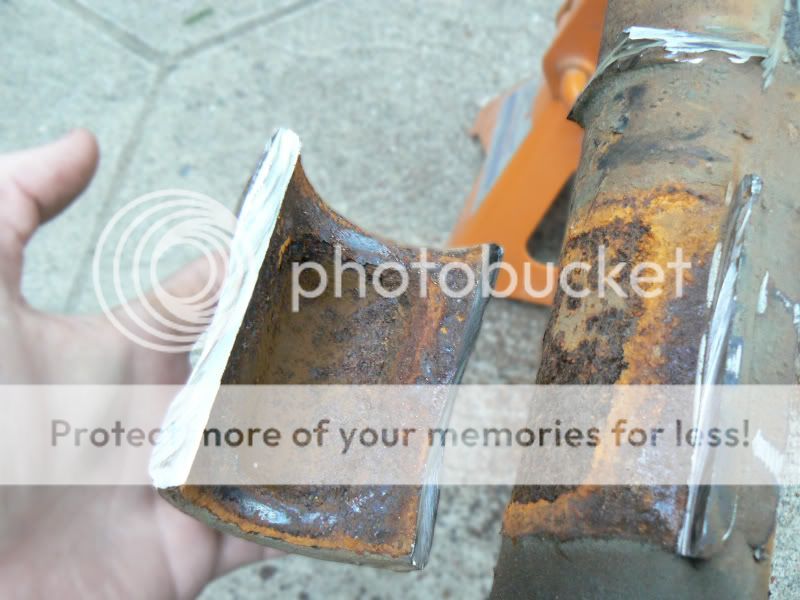
That cast portion cut in half, showing no axle tube:
dana4478-79axle_cut.jpg


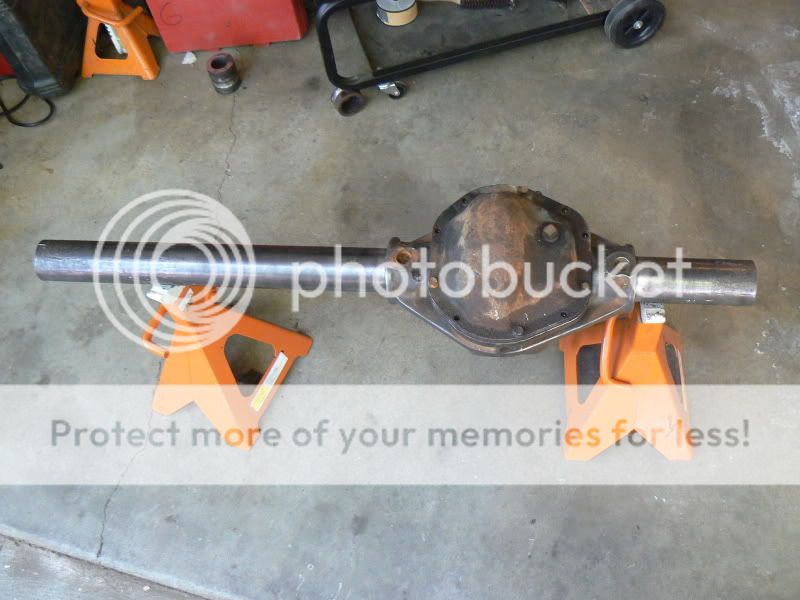
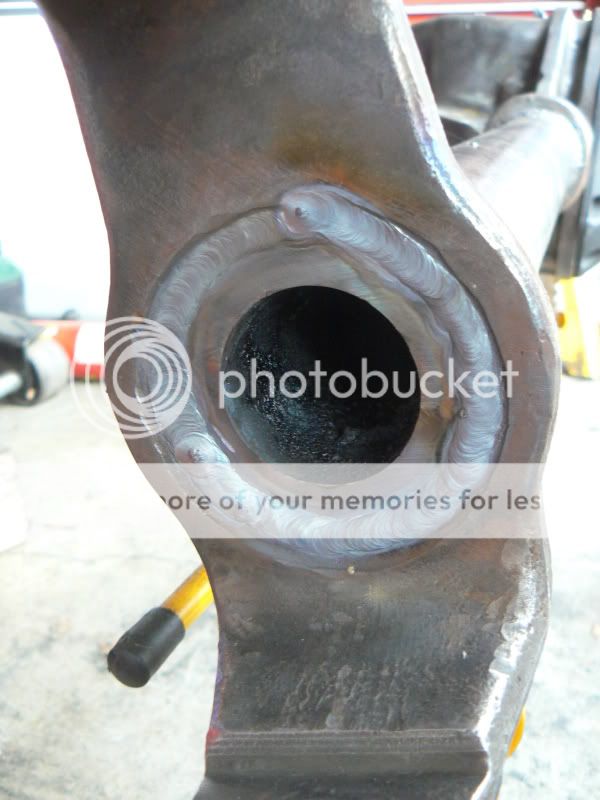
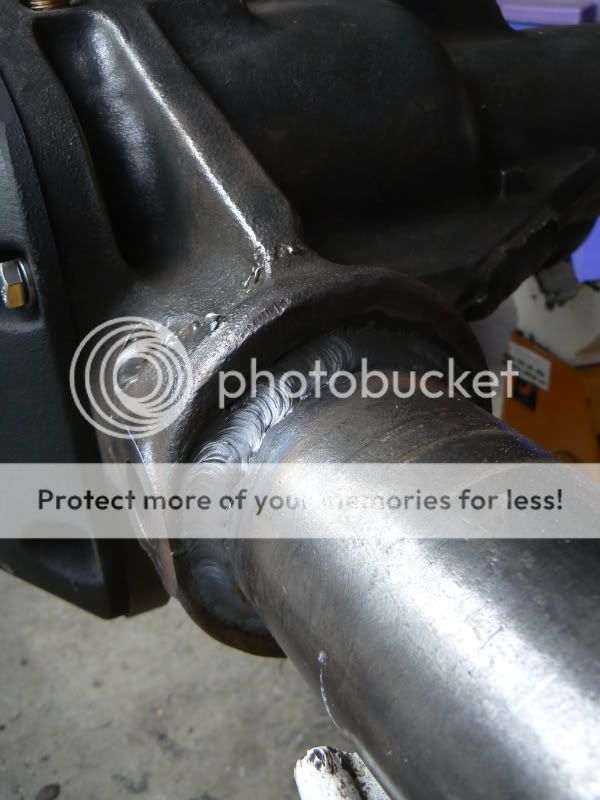
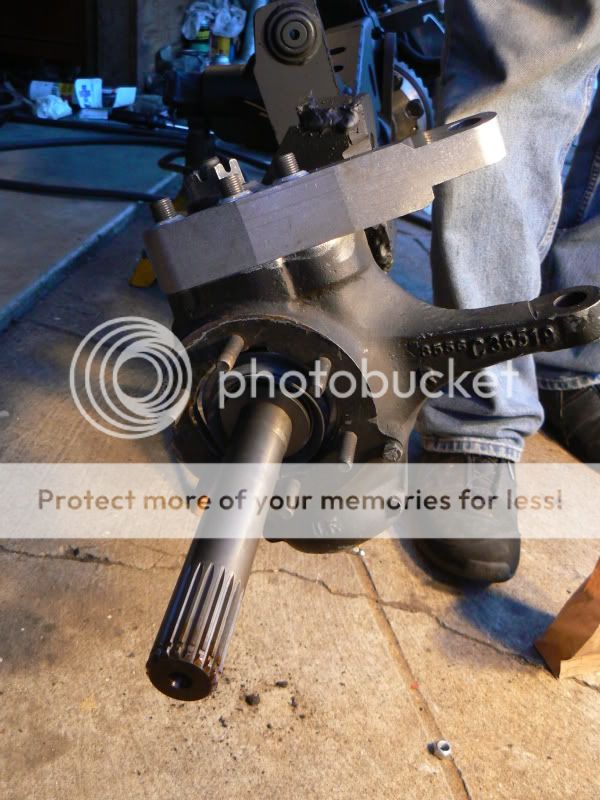
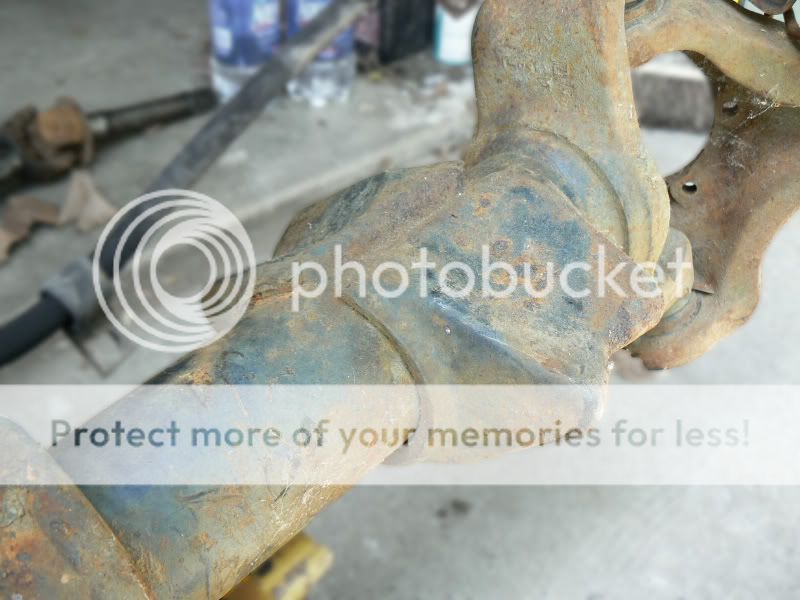
This is my axle showing the welded on wedges:
P1010259aa.jpg


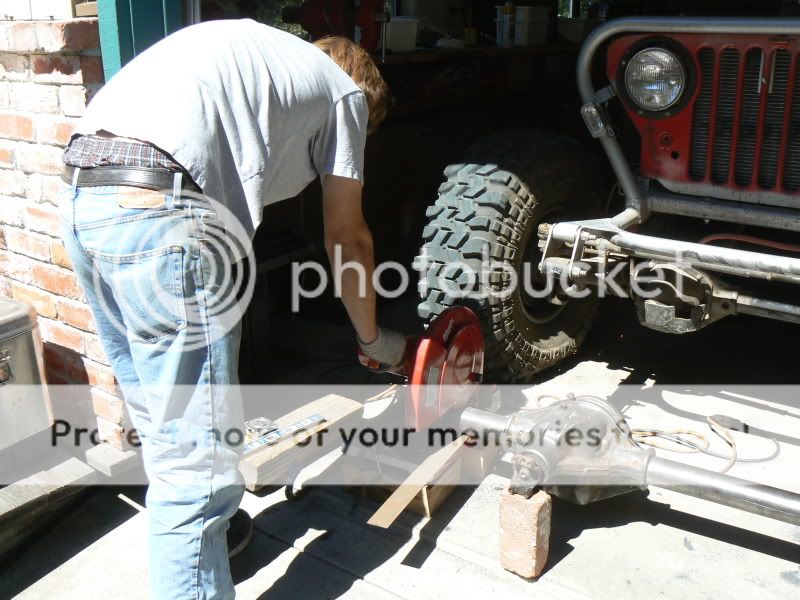
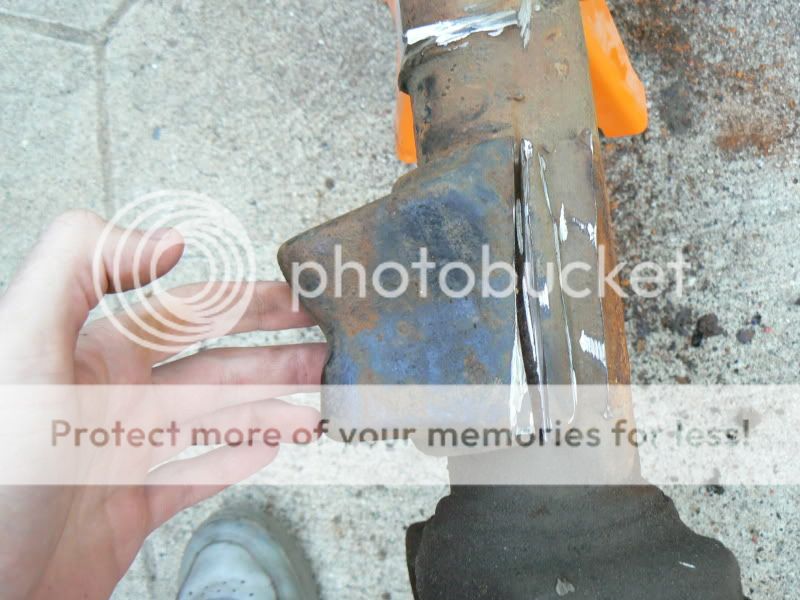
To be honest, I was scared at taking this first step. I thought I might cut into the tubes, and render the axle useless. I finally manned up, and started cutting. I used a grinder with a cut off blade, and I cut before the weld. I then used a grinder to get the rest of the weld off.
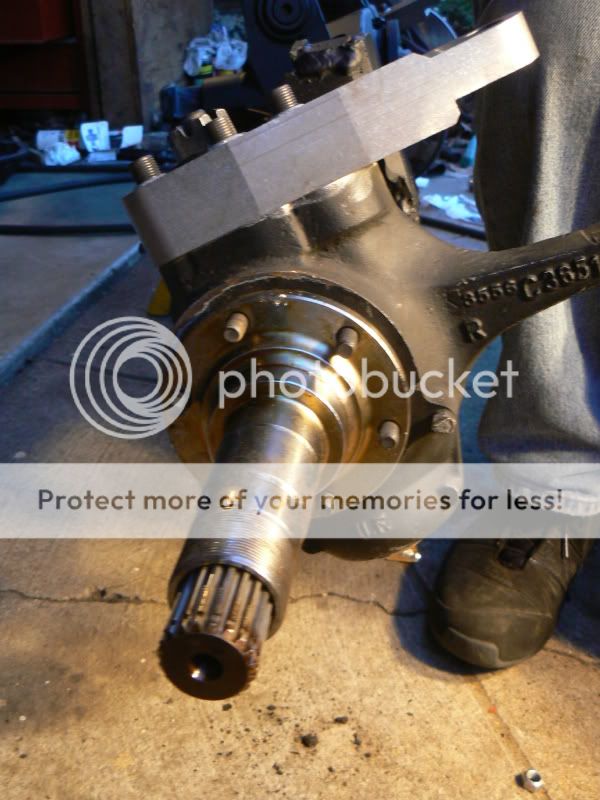
P1010261.jpg


Off:
P1010267aa.jpg


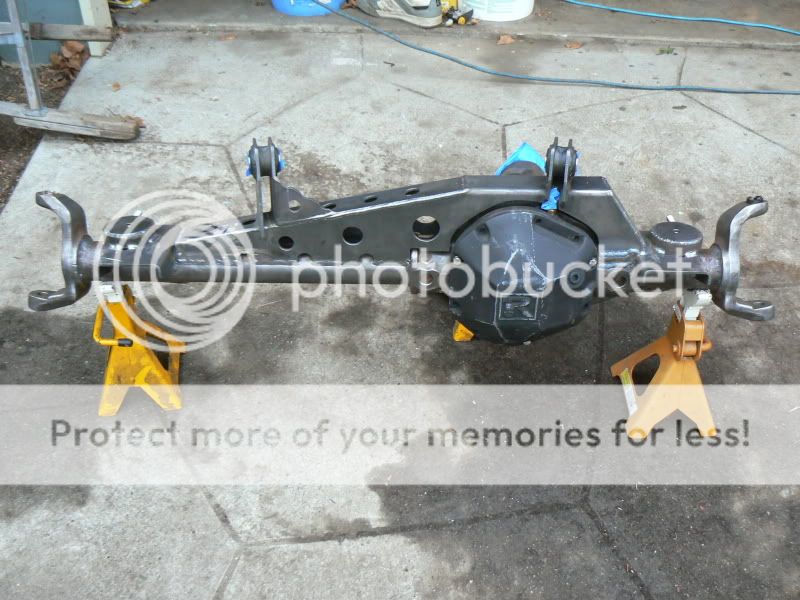
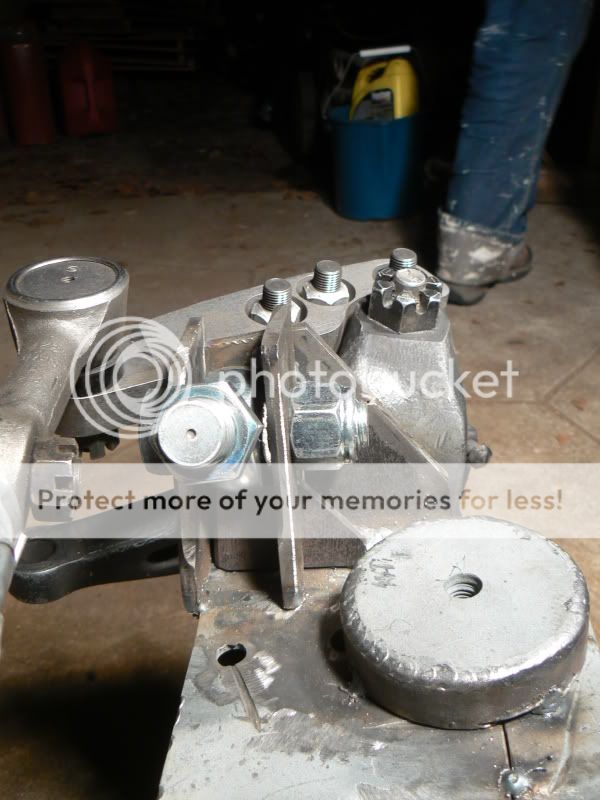
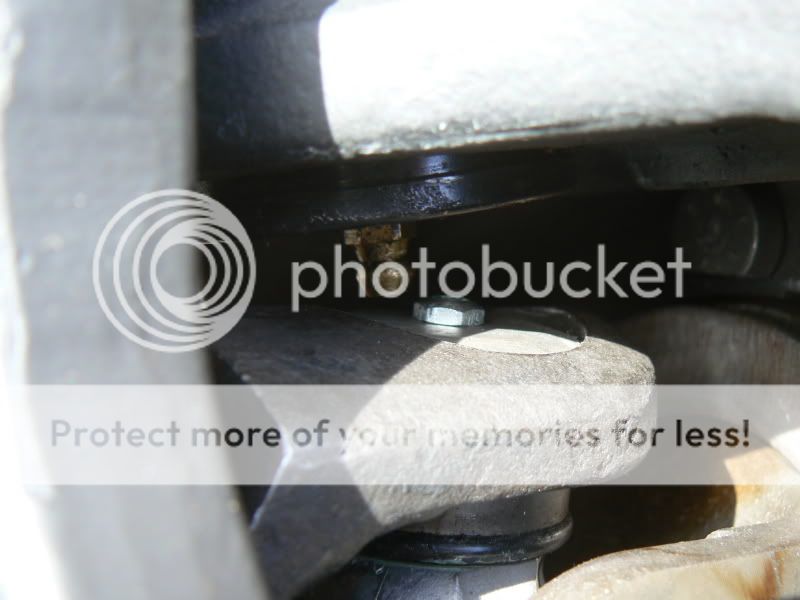
All four wedges cut off as well as the steering stabilizer mount.
P1010264.jpg


I then waited another six months to start doing the next step of this process as I had to go back to school.

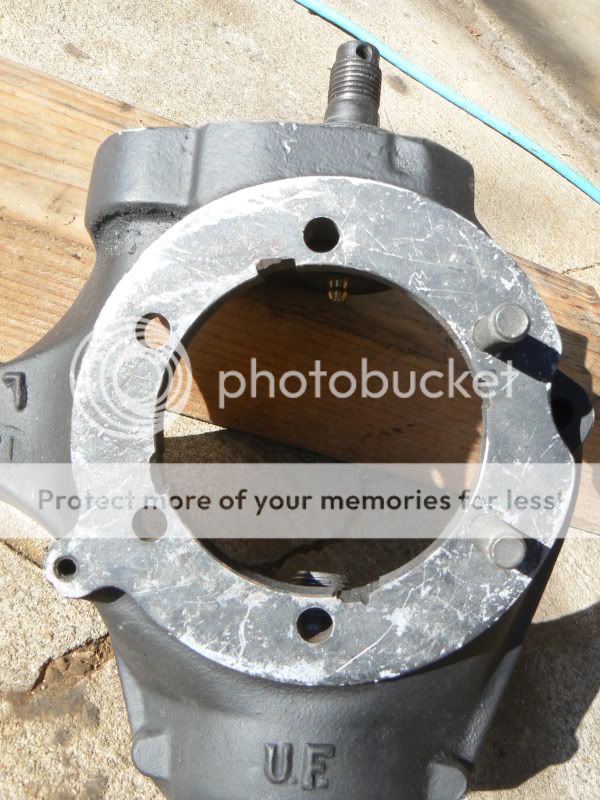
What the heck do I have?
I knew I had an early 1970’s high pinion 44, but I had no idea what it was out of or what year it was, and I needed that information to find out how much I should narrow it by.

I asked about the Build of Materials that was stamped on the axle, and was able to find out my axle was from a 1773-1975 Ford F-100.
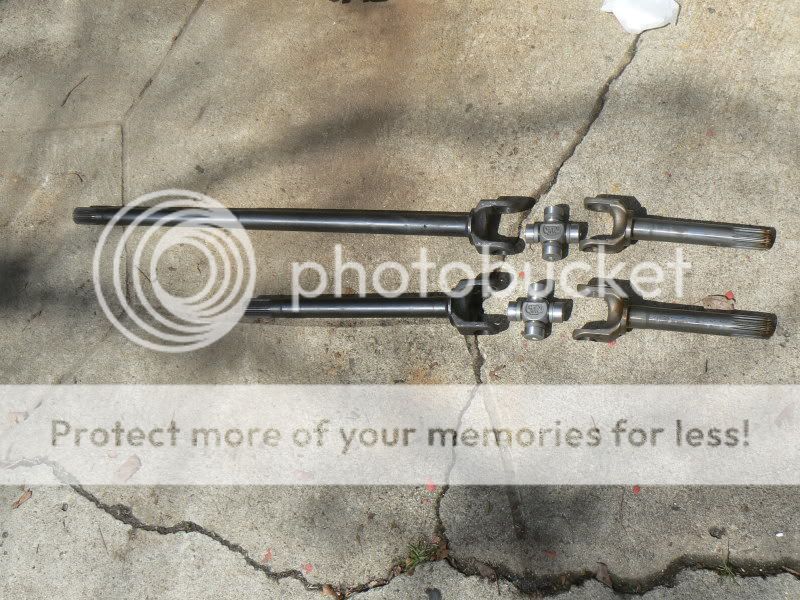
Shaft lengths:
Long side-33.906"
Short side- 18.906"
 
Cutting Cs
If you are ready to swear up a storm, yell like a middle school girl, and be ready to stop doing your own axle work, have I got the job for you!

Actually, it wasn’t that hard, it just took a bunch of time to figure out what the heck I was doing. I watched the Colorado guys do it for the NAXJA Raffle XJ, and figured I saw it done once, so I could do it easily the second time. Not quite the case.

Before I could do all that, I needed to take off the stock knuckles. I took the upper castle nut off with a crescent wrench, and the lower off with a 1 1/8’’ socket. I expected the knuckle to fall right off. It took a sledge to whack them off. So if you’re doing this yourself, don’t be afraid to hit them harder.

I unfortunately did not take any pics when I cut off the welds on the inner C’s, but just take your time, and use a big hammer. I tried using a 2.5 pound hammer which didn’t work. I got frustrated until I saw some pictures of people using a 10 lbs sledge hammer, so I went out and got myself one of those, and found that to actually work.

While this link is for a Dana 30, it’s the same principle and might help.
http://naxja.org/forum/showthread.php?t=935127

Narrowing
The moment of truth.

Since I had a XJ 44 in the back, I wanted to try and keep the axle width as close to stock as possible. I also wanted to not get custom shafts as I was hoping to use junkyard shafts as spares, and be able to order the shafts with relative ease.

Most people who narrow their 44’s go to Jeep Wagoneer shafts with great success, so I followed suit.

XJ_ranger pointed out to me, that the Warn shaft lengths were not always correct, so I contacted several axle manufactures and found that Warn was actually right for their Waggy shaft lengths.

1982 Jeep Wagoneer axle lengths:
Long side- 32.12"
Short Side- 15.8"

This was the point of no return.

According to my calculations, which I backed up with others thoughts, I subtracted the Waggy axle shaft length from the F100 length.

Long side
33.90625- 32.12= 1.78625

Short Side
18.90625- 15.8= 3. 10625

Those numbers were the amount of tube I had to cut off from the outside measuring in.


So, I took those measurements, a tape measure, one Sharpy, and one chop saw, and narrowed my axle.

Keep in mind you measure from the outside of the axle tube in 1.78625’’ and make your mark, keeping in mind the width of the marker.

Double check your measurement. Triple check it. Ask your friend to check it. Go back and check it again. Check your numbers. Check it again. And have your friend cut:
0042.jpg


Do the other measurement for the other side, check it, and cut, and you now have a narrowed axle.
0062.jpg


Setting your pinion and caster angles
According to Crash's Dana 44 tech thread 5-7* of caster angle is best, and at 6’’ of lift you need about 13* of pinion angle.

I wanted to double check what my pinion angle should be, but unfortunately the pinion angle on my 30 was not correct, so XJ_ranger came over and helped me figure out my pinion angle which was 13* as well.

Now to put the inner C’s back on.

This shows what caster angle is. You want 5-7* of positive caster, ie the top if the C is pointed towards the rear of the Jeep.
caster.jpg


I mocked up the axle at 13* of pinion angle, and put the C’s back on with 6* of caster. Make sure you get both sides the same. It took me awhile to get the C’s on, angled right, and to ensure both sides were the same.

Due to several recommendations, I also mocked up the knuckles and measured the camber angles to make sure it was right. I did not take any pictures of all this, but here is a picture of the stock C location and knuckle showing a 0* camber angle.
006.jpg


Knuckles for high steer
I wanted high steer. I also wanted a 5x5.5’’ bolt pattern to match my dual drilled rear axle shafts. In order to do this you have to mix and match parts. Unfortunately stock Ford knuckles cannot be machined, drilled and tapped for high steer arms. You have to mix and match Chevy and Ford stuff, which I will talk about in a bit. My friend had an extra set of Chevy knuckles that he was not using which he gave to me.

This is comparing the stock Ford knuckle(top) to the Chevy (bottom)
016.jpg
.

Ford left, Chevy right
017.jpg


There are two different Chevy knuckles. Some that can only be used with disk brakes, and others which can only be used with drum brakes. Make sure you get the ones that use disks. Picture taken from Mr. N:
Dana44Flatops_Disk_vs_Drum.jpg


I shipped the Chevy knuckles off to Parts Mike in Northern California to have them machined and tapped for high steer arms.

Here are the parts you need for the “small bearing Chevy/Ford 5x5.5 bolt pattern with high steer setup”:
-1976-1986 Ford F150 Rotor Hub assembly
-1984 Chevy K10 calipers and caliper brackets
-1972-1976 Chevy 1/2 DANA 44 K10 “small bearing” spindles

More on the assembly later.


The knuckles also have to be ground down due to the hole where the shafts slide in being too small for the oversized alloy shafts and CTMs.
0027.jpg


I used an angle grinder, sawzal and a file to get the CTMs to fit.
0066.jpg

0074.jpg


Then when I finally tried to get the shafts in, I found that the ears were to big as well. So I found an abrasive grinding wheel that goes on a drill and took a bit off of the knuckle again.
 
Rewelding Cs and diff
Skip forward a couple months to allow for more school, come home, and start working again.

A family friend owns a Tig welder, and he kindly offered to do most of my welding for me.

I had him do the welding in several different steps, and the axle got progressively heavier and heavier as it went along.

First, I had him weld the inner C’s up, both inside and outside and also welded the tubes to the center section.
0025.jpg


0035.jpg


0045.jpg


Truss, mounts, coil pads, etc

I got the axle back, and mocked the spring perches on. This was a point at which I was at a cross roads. The truss I got from TnT had a track bar mount already on it, and I was about to use it. However, I had read multiple threads about the possibility of bump steer with a short track bar, which happens when you use the TnT bracket. I had recently gone out to Johnson Valley and was introduced to the go fast part of offroading, and I was trying to get a well handling front suspension for the whoops that are common on the lakebed. So I cut off the T&T mount and made my own. I also altered the T&T coil buckets and moved them farther back to sit behind the axle centerline to give me room for the axle end track bar joint.

I had the coil buckets and truss welded on.
0064.jpg


0015.jpg


At this point I can see the light, I have an almost fully assembled axle housing, waiting for the rest of the parts.

Track Bar Mounts
I ordered a 1’’ shanked Johnny Joint for the frame side of the track bar, and a 7/8’’ heim for the axle end due to clearance issues.

Because the Johnny Joint wouldn’t fit into my RE bracket, I had to make my own out of ¼’’ plate.

The lower ended up being a bit more difficult to make. I had to make sure I didn’t hit the coil with the mount, ensure the track bar didn’t hit the TnT truss on compression, and make sure the steering didn’t hit at full lock. Here it is all tacked up. I added a little bit more plate after this, but its pretty much the finally rendition.
003.jpg


004.jpg


006-1.jpg


Here are the angles I ended up with.
003-1.jpg

Duct Tape and PVC will be reinforced with bailing wire and JB Weld at a later date.

Ive seen people who have run into interference issues between the tie rod and the trackbar when they go with high steer and the T&T truss with normal coil mounts, so just be aware of that potential problem.

T&T Truss with Waggy Width Axles
There is one problem when you use the T&T truss kit and narrow the 44 down to Waggy width. It shifts the center of the axle off about ¾’’. Meaning that if you put the truss and coil pads on how they fit, and you center the coils, the axle will be pushed out ~.75’’ towards the passenger side.

This isn’t a huge deal, but it was something that I wasn’t sure what to do about. I finally decided that I would cut the truss to be able to move the drivers coil mount over as much as I could, and then move the passenger side coil mount over that same distance, and leave the control arm mounts where they were.

I ended up being able to move the drivers side coil mount over .5’’ and I matched that on the passenger side. It is still off .25’’, but realistically that will not have any effect on the suspension or how things sit.

The control arm mounts are still off ~.75’’, but since I have long arms that are around 35’’ long, I figure that isn’t enough to worry about. I considered cutting off the upper mounts that are on the truss and rewelding them, but I decided it was to much work.

Steering
I was happy with the quality of the JCR OTK steering I had before, so I ordered up another set for this axle. This was one part I hadn’t thought about. I didn’t realize where the TREs mount, the drag link and tie rods were shorter on the 44 so I wasn’t able to reuse the ones I had purchased for my D30.

My lengths were 38 ½’’ for the tie rod, and 18 ½’’ for the drag link.

Due to the steering arms being longer then the D30 stuff, I also had to get a new pitman arm so I could get as much steering as possible. A common swap is a pitman arm out of a Waggy. It bolts up to the stock XJ box, and is pretty close to the right length.

My Parts Mike high steer arms were 6.5’’ from ball joint to TRE hole.
049.jpg


The stock XJ pitman arm was about 5.5’’ center to center. Ignore the camera strap.
0094.jpg


The Waggy arm is about 6 ¾ ‘’ center to center and a lot flatter. Here it is compared to the stock XJ arm.
0075.jpg
 
Axle shafts, with CTM pics
I didn’t take any pictures of the assembly of my Warn stub shafts, CTM Joints, and Alloy USA inners, but JeepFreak21 has an excellent writeup that helped me understand the provided instructions that came with the parts.

Pile of parts waiting to be put together:
002.jpg


Assembled:
002-1.jpg


I had ordered my spindles from a place online, and a package of parts came with them. I thought the oil slinger that goes on the stub shaft was in that bag of parts, but I came to find that only the seal and spacer for the stub shaft was in that. I went to several different parts stores to try and find some, and most of them had never heard of the part I was looking for. I finally got a guy at NAPA that told me it was not a part you could buy. I needed them now, so I had to pull them off the shafts I had got with the housing. Cleaned up, they work fine.

So just a heads up, if you want new ones, buy them online for around $3 per slinger, as you most likely wont be able to buy them at your local auto parts store.
Slinger, seal and spacer on the stub shaft:
001-1.jpg


I also ran into an interference issue between the upper ball joint zerk fitting, and the zerk fittings on the CTMs. I ended up greasing the ball joint, and then getting a threaded plug to put into the ball joint. When I need to grease the ball joint, I will disassemble the axles and put a zerk back in.
006-2.jpg


Outers Install
I didn’t take that many pictures of this part, but there are several links online showing how things go together. Once you have all the parts, its pretty obvious how things go together. I was nervous about this part as I had never done anything on a 44 before, but it really is pretty self explanatory where everything goes.
Basic stuff:
Installing high steer studs and ball joints into knuckle
http://partsmike.com/44knuckle_hard_install.html

Ball joint install:
http://partsmike.com/44knuckle_install.html

FYI, high steer studs should be torqued to 105 lbs as per Parts Mike.

Slide shaft in:
022.jpg


Spindle goes on. Remember the holes are not symmetric, so rotate it around until it fits:
023.jpg


Caliper mount goes on. The caliper goes towards the back. This originally had a dust shield on it, but I took it off as Ive had bad luck with them bending into the rotors and causing issues. Tighten nuts to 40 lbs.
024.jpg


To grease the bearings I bought a bearing greaser at Harbor Freight. At first I couldn’t get it to work, but I had just tightened the sides to much.
010.jpg


I installed both the inner bearing and the seal, and slid the hub assembly onto the spindle. Then I pushed the outer bearing in with my hand, and tightened the hub nut to 50 lbs and then back off 90*.
This is was it looks like after that:
027.jpg


I pushed in the Warn locking hub, don’t forget the lock ring.
029.jpg


030.jpg


031.jpg


Install the outer part of the locking hub
032.jpg
 
could be just me, but no pics are showing

otherwise, this should be a good thread.
 
The day before, paint your calipers. Ive heard it adds 10hp, and all the high school girls love it!
033.jpg


Install the supplied clip onto brake pad that goes on the side with the piston.
034.jpg


I had to go buy a 3/8’’ allen wrench for the caliper bolts because I apparently didn’t have one. Once I had that, I tightened those up, and I was done.
039.jpg


This was a new thing for me. Rather than the normal 3 piece hub nuts, I got this one piece ratcheting thingy.

Typical 4 prong holes
020.jpg


Backside with a nock for the keyway in the spindle. For some reason the nock was too big for the Chevy spindle, so I had to grind it down a bit.
018.jpg


Brakes
Like said before, I used rotors off of a 1985 Ford F150, 1984 Chevy K10 calipers and caliper brackets and Chevy small bearing spindles.

These brakes are huge compared to the stock Dana 30 stuff. 11.75’’ across!
007.jpg


I haven’t actually finished up the brakes, but right now I think I found the right banjo bolt. It goes through my RE extended brake lines, and threads into the Chevy calipers. The parts guy said they came from a Chevy. Really descriptive, I know, but the Napa part number for them is 82699.
060.jpg


Finishing
By now you’re most likely wondering how exactly this is a bolt in, narrowed high pinion Dana 44. Well here you go.

I bolted it in after a fresh coat of flat black paint.
056.jpg


I measured the WMS- WMS width, and its 61.5’’. If my memory serves me right, stock is around 60.75’’, so I gained a little less than an inch of width.
058.jpg


So that concludes my write up for the time being. As of right now its not fully finished. Once I go home for summer I will be finishing it up, and doing some comparisons of the D44 vs the D30. And I might even get to take the Jeep for a drive!

Things I need to do to finish this project fully:
-Install brake lines and bleed brakes
-Take off rear drums, and have them drilled for a 5x5.5 bolt pattern.
-Take out rear shafts and put studs into the 5x5.5 holes
-Dismount rear tires off of old wheels, and install new wheels
-Mount all four wheels back on Jeep
-Make center limit strap. Im thinking about using a hitch pin for the lower mount so I can disconnect it fast for on the road and “go fast” stuff, and connect it when Im on the trail.
-Find stock sway bar, and make axle end mounts. Im going to be buying JKS quick discos.
-Fill diff with oil
-Plumb air lines for the ARB
-Plumb lines for the axle breather
-Go wheeling!
 
Helpful Links
The Proverbial Dana 44 Bible by Mr. N
http://77cj.littlekeylime.com/web_rs44.html

Random D44 Questions
http://naxja.org/forum/showthread.php?t=927594

Whos Who of Dana 44 axle shafts
http://pirate4x4.com/forum/showthread.php?t=446466

Best Stub Shafts
http://pirate4x4.com/forum/showthread.php?t=686856

Improving Stubs
http://pirate4x4.com/forum/showthread.php?t=698379

Dana 44 stub shaft lock ring problems
http://naxja.org/forum/showthread.php?t=69910

Differences between 44 stub shafts?
http://naxja.org/forum/showthread.php?t=63416

Cruizin Illusions Dana 44 build
http://naxja.org/forum/showthread.php?t=902015

Cruizin Illusions Dana 44 build part II
http://naxja.org/forum/showthread.php?t=907435

High Steer/ Coil Interference Issues
http://naxja.org/forum/showthread.php?t=942427

Which Stub Shafts do I need?
http://naxja.org/forum/showthread.php?t=941785

Best cromo shafts (D60)
http://pirate4x4.com/forum/showthread.php?t=739989

Other options for D44 steering?
http://naxja.org/forum/showthread.php?t=953792

Dana 44 BOM
http://naxja.org/forum/showthread.php?t=921672

Sierra Drifters’ Build
http://www.jeepforum.com/forum/showthread.php?t=397243

Axle Lengths of different axles
http://www.wagoneers.com/FSJ/tech/Axles-Driveline/axle-dimensions.html

Prepmechs’ 44/9’’ swap
http://www.naxja.org/forum/showthread.php?t=918242

shmoken875s’ 44 build thread
http://www.jeepforum.com/forum/showthread.php?t=466573

Gravesdiggerxj's 44/9'' build
http://www.naxja.org/forum/showthread.php?t=927699

BS Fab Tech
http://www.bsfab.net/?cat=9

Broken 44 shafts
http://pirate4x4.com/forum/showthread.php?t=676044

Dana 44 Ball Joint Installation
http://12.29.16.230/mmimages/jeepdocs/dana44balljoints.pdf

Ball Joint Install
http://www.geocities.com/lars915/BallJointIinstall.htm

How do I get the ball joints to seat
http://naxja.org/forum/showthread.php?t=973761

Adjusting Caster
http://www.offroaders.com/info/tech-corner/project-cj7/project-cj7-castor.htm

Routing ARB air lines
http://naxja.org/forum/showthread.php?p=244095476

Research Info
http://pirate4x4.com/forum/showthread.php?t=681596

Dana 44 questions
http://naxja.org/forum/showthread.php?t=57304

Welding threaded inserts
http://pirate4x4.com/forum/showthread.php?t=726565

How do I weld threaded inserts
http://www.colorado4x4.org/vbb/showthread.php?t=138041

Outers Install
http://www.lieblweb.com/TechLinks/HubInstall/HubInstall.htm

Regaining steering angles
http://naxja.org/forum/showthread.php?t=68080

Small bearing spindle source
http://naxja.org/forum/showthread.php?t=47645

Dana 44 steering
http://www.pirate4x4.com/forum/showthread.php?t=670005

Where to get CTM grease
http://pirate4x4.com/forum/showthread.php?t=401600&highlight=ctm+grease

Problems with CTMs accepting grease
http://pirate4x4.com/forum/showthread.php?t=282007

D44 oil capacity
http://www.colorado4x4.org/vbb/showthread.php?t=141829

High Steer for a D44
http://naxja.org/forum/showthread.php?t=986099

Sorry for the huge amount of links, but almost all were helpful to me, and its always nice to have info when youre doing something.
 
gonna be at sierrafest? :D
 
Last edited:
Must be a tech writer, except this is actualy useful ;-)
 
Wow, great write up, I'm needing to do the same to my rig and the way I am, in about the same time period. I know it took a lot of extra time and effort to compile all this into a very good write up, "we who are about to cut and weld, salute you". They should consider putting this in the library....
 
AWESOME JOB :clap:

great work, and top notch write up!! I'm in the process of doing a HP44 as well, and I'll use this page multiple times before finishing, I'm sure. :) Thanks again
 
Great write up! This is going to be really helpful to some folks. I like the way you did the track bar axle mount, gives it a little extra length. I also like that you welded the C's on both sides, most just weld the tubing side, not the outside. I didn't even think of welding the other side of mine. This should be OK without adding a gusset to the bottom of the C and the tube. I've seen every custom axle builder addthe gusset, I added one after I cracked the weld and broke off a C. Also nice work finding the right banjo bolt, I just drilled out my brake line to fit the slightly bigger banjo bolt.

Nice work.
 
sweet write up. do you have a cost estimate (materials only)?
 
could be just me, but no pics are showing

otherwise, this should be a good thread.
Jesus dude, you have to let the page load. You managed to post in the 30 second wait time between my posts. Damn.

gonna be at sierrafest? :D
No:bawl:Unfortunately school starts that week, so Ill be in class while you guys are out wheeling.

Great write up. I got one question for you, where did you get that ratcheting spindle nut?

Craig
I got all the outers through a family friend who works at a Ford dealership. I assume any Ford place would have them.

Great write up! This is going to be really helpful to some folks. I like the way you did the track bar axle mount, gives it a little extra length. I also like that you welded the C's on both sides, most just weld the tubing side, not the outside. I didn't even think of welding the other side of mine. This should be OK without adding a gusset to the bottom of the C and the tube. I've seen every custom axle builder addthe gusset, I added one after I cracked the weld and broke off a C. Also nice work finding the right banjo bolt, I just drilled out my brake line to fit the slightly bigger banjo bolt.

Nice work.
I wish I could say that the welding the inner and outer sides of the inner Cs was my idea, but I remember reading about your problems you had with your 44 under the yellow Jeep, so I didnt want to have the same problems. A couple extra inches of weld, made me feel a lot more comfortable.

sweet write up. do you have a cost estimate (materials only)?
Materials, no idea. I already had all the gas, welding wire, sawzal blades and grinding wheels, steel and almost everything else.

I guess if I was paying for everything right out, it would be about $200? But thats for a full spool of wire and gas tank for the welder, and I didnt use anywhere near that much.
 
Jesus dude, you have to let the page load. You managed to post in the 30 second wait time between my posts. Damn.

ya, sorry about that. I just happened along and saw the first post, when I replied and saw more, I was feeling pretty silly.

mods feel free to delete that first post of mine in the middle of this great write up.
 
ya, sorry about that. I just happened along and saw the first post, when I replied and saw more, I was feeling pretty silly.

mods feel free to delete that first post of mine in the middle of this great write up.

Its all good. I have been known to make the same mistake.


Just giving you grief.:laugh3:
 
Back
Top