Follow along with the video below to see how to install our site as a web app on your home screen.
Note: This feature may not be available in some browsers.
Welcome to the new NAXJA Forum!
If your password does not work, please use "Forgot your password?" link on the log-in page.
Please feel free to reach out to [email protected] if we can provide any assistance.
I bought them from Discount Tire Direct, who gives a free replacement warranty on non-repairable punctures. Researched it a bit and it seems legit. Without that I would have bought Kevlars. Could probably have gotten the same thing from others but no extra charge from DTD and they already price matched the lowest.
My buddy has those tires on his Tundra. He put a smal hole in the sidewall at RC a month or so ago. He also got his from DTD, and they took care of him. Seems like a good place to buy tires.
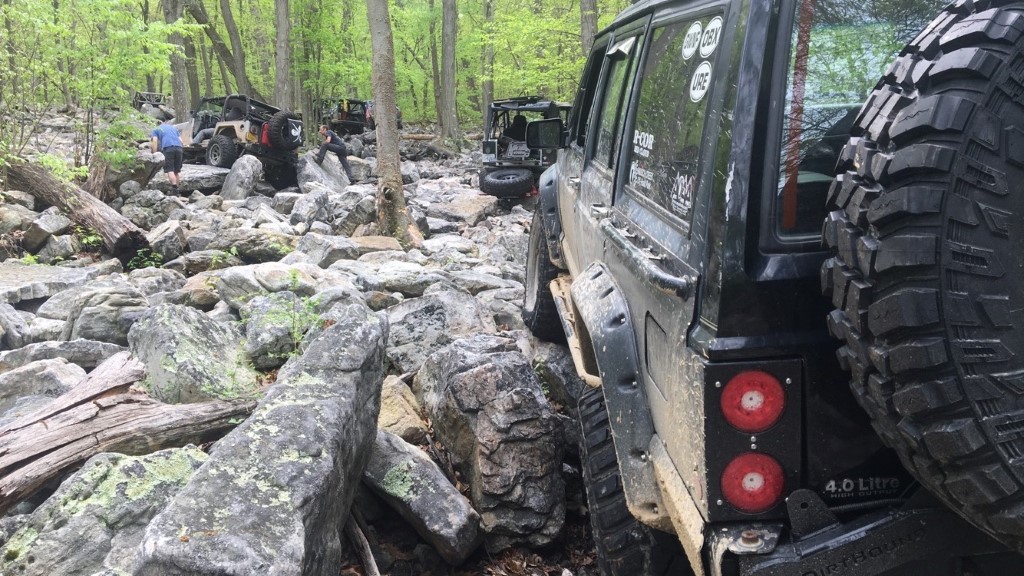
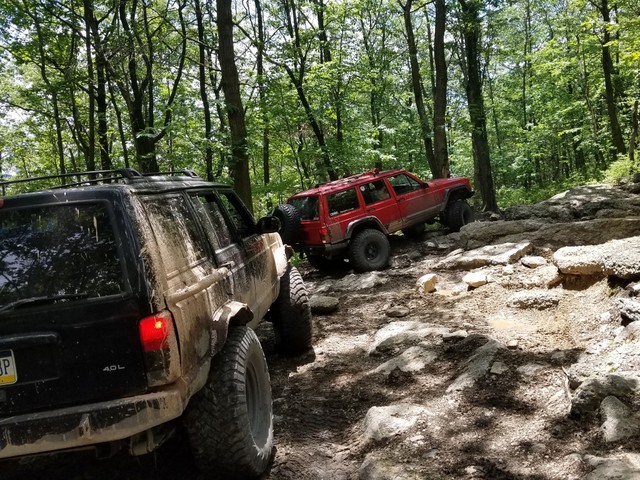
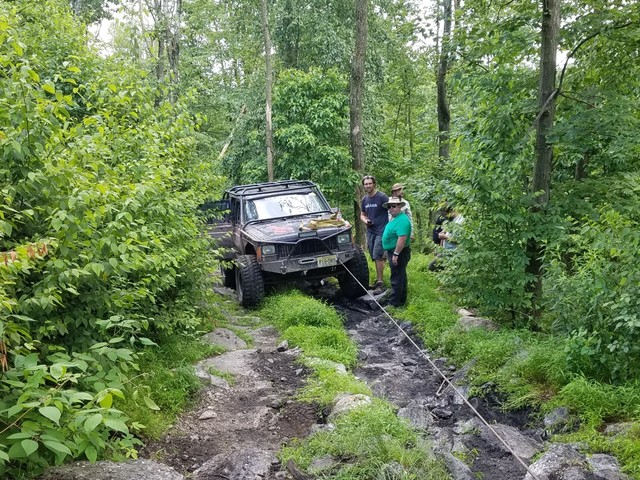
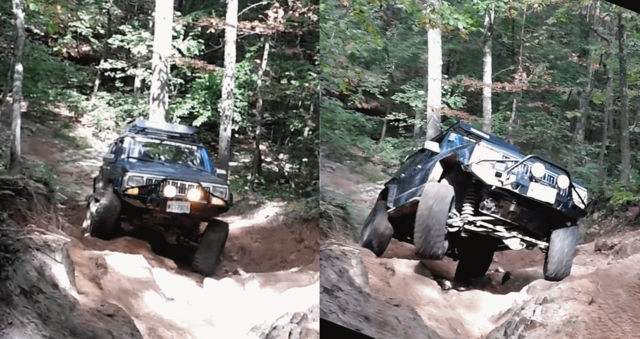
Went wheeling at Big Dog's Ice Breakers at the Cove Campground in Gore VA. Rode one of the hardest trails with a group of friends from VA
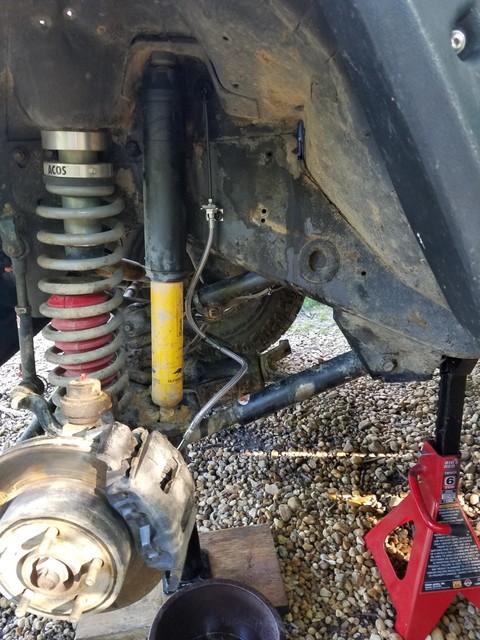
My build worked really well. Just had to keep from high-centering and the lockers would pull me through just about anything. The only build-related issue is the coil inserts threw the upper caps and the ACOS jounce bumps are sliding into the void and tearing them up, so I need to make better caps.
Had some overheating on the way home, again. I know I have an exhaust leak so looking at that as the probable problem.
I got to looking for my overheating issues and ended up tearing the engine bay apart.
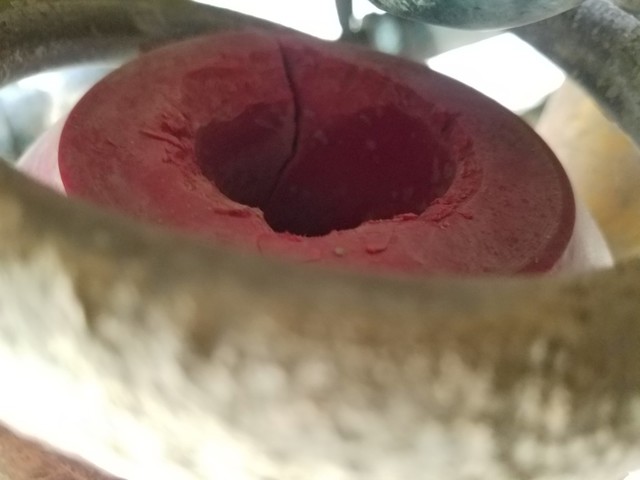
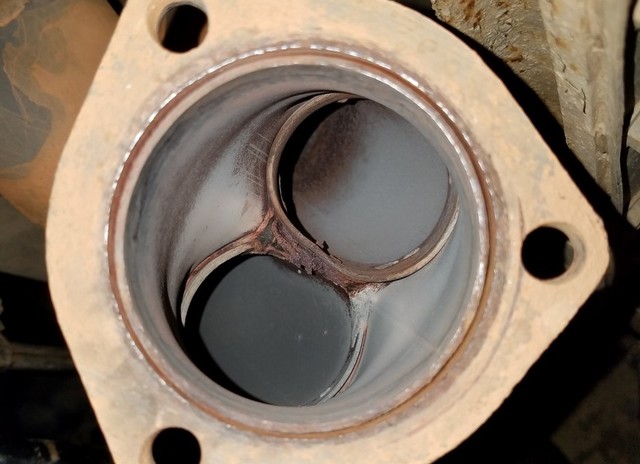
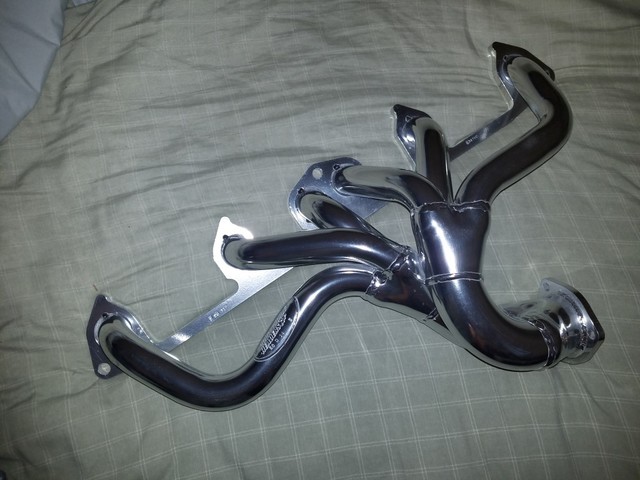
I knew I had an exhaust leak, so I used a 3-foot long section of 1/2" hose in my ear and waved it around the engine bay. Very loud where the headers meet the downpipe. I had already tightened that joint a couple of times, so I figured the donut gasket was blown out and bought another to swap. But when I pulled the downpipe off, I found rust inside the header.
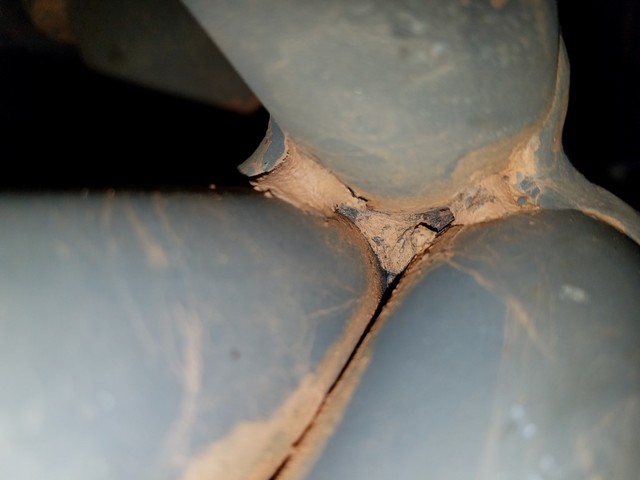
The header is T304 stanless and is not supposed to rust. A little more looking around and I found more rust around the welds.
I called Thorley and they said it looked like the wrong welding wire had been used, and agreed to replace under warranty. So I pulled it off and shipped it to them. Minimum of two weeks downtime until replacement would arrive, so I decided to tackle a few other things that needed work in the meantime.
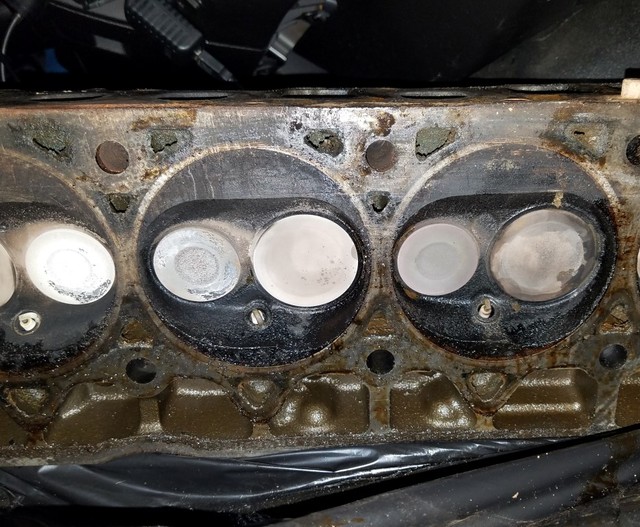
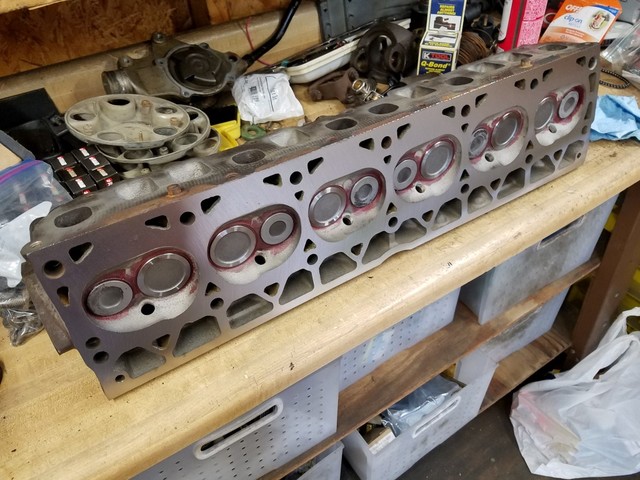
Since I was going to be deep into it, I also decided to pull the head and get it checked for damage from overheating. Once I got it off I found a ton of crap inside the coolant passages. It felt like dirt, although no idea had it would have gotten into the coolant. Sent it to a machine shop for a full cleaning and valve work.
I knew I was drawing water through the exhaust because the engine tried to die everytime I did a water crossing. I also knew the exhaust parts were damaged from all the water and mud. I replaced the muffler and bypassed the catalytic converter with a piece of straight pipe (ordered another Magnaflow and just waiting on it now). Even the inside tip of the O2 sensor was caked in mud.
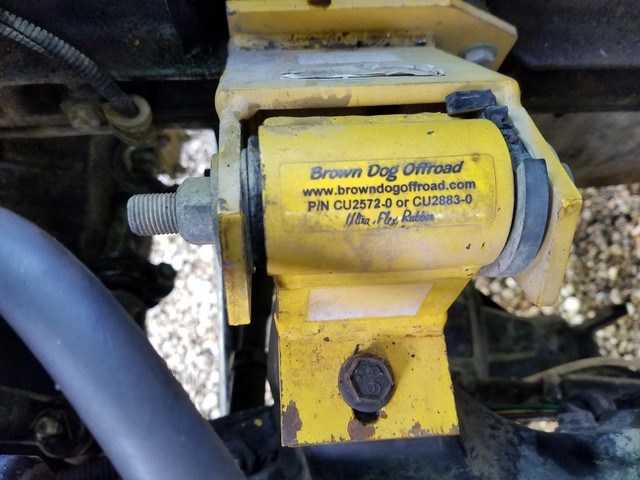
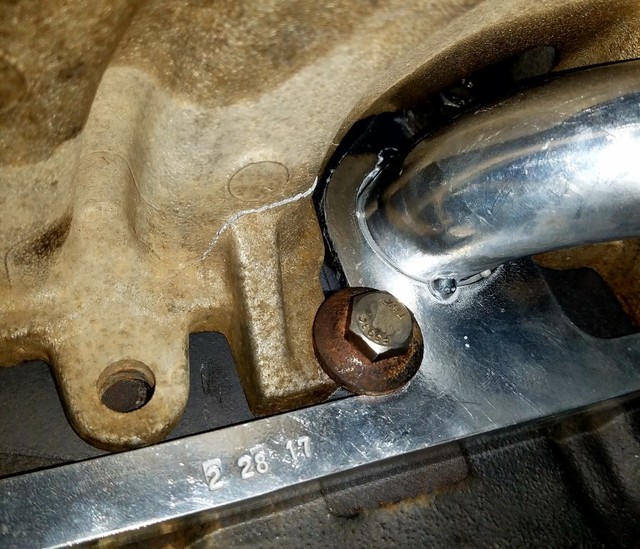
Drivers side Brown Dog motor mount was beat. Been meaning to replace it but I couldn't get the bolt out without removing the exhaust.
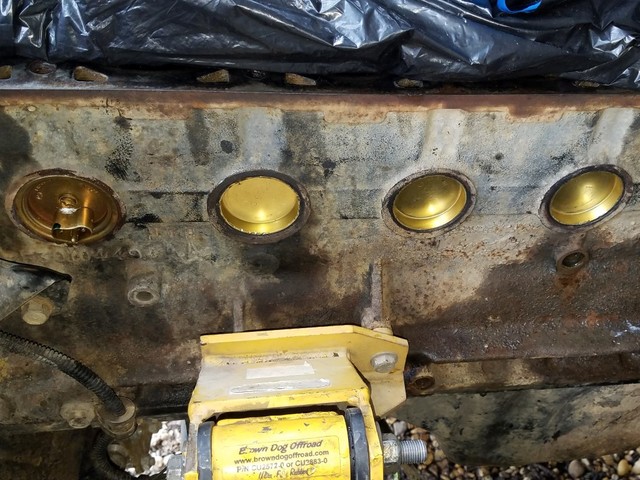
I had also been meaning to replace the freeze plugs, and I had picked up a block heater a few years ago, so those were swapped out
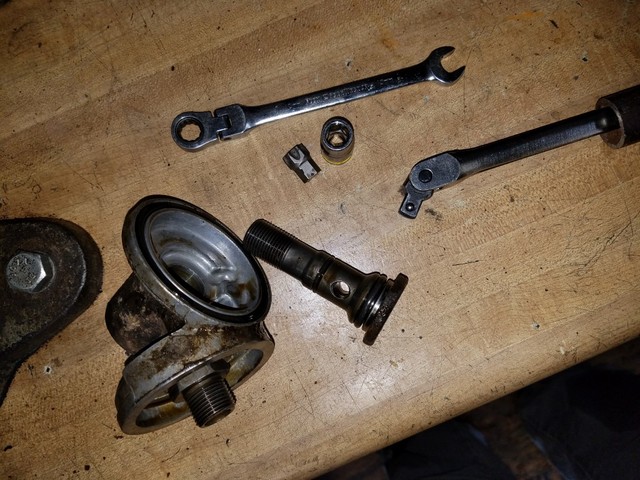
Oil filter adapter elbow had been leaking for a while. I have had a set of o-rings for over 5 years. Good time to replace them too.
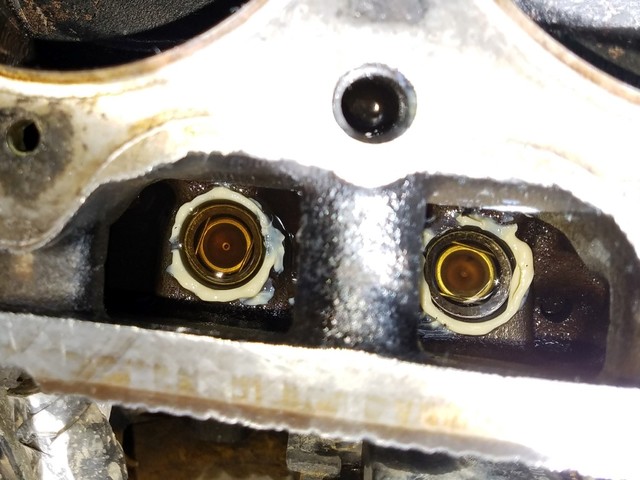
I've been having valve train noise on cold start for a while, so I also pulled the lifters to check them. A couple of them made a lot of noise
Did a lot of research and concluded it was safe to replace the lifters without the cam as long as I kept using my Rotella T4 high ZDDP oil, so I bought a set from Summit and swapped them all out
I got the head back from the machine shop. Resurfaced, full valve job, new seals, and all new intake valves (the old ones had been scarred from sucking dirt).
Replacement from Thorley came in
Put the engine back together, and cracked the intake manifold on a dowel. Thought it was centered but obviously not
All back together now and running strong.
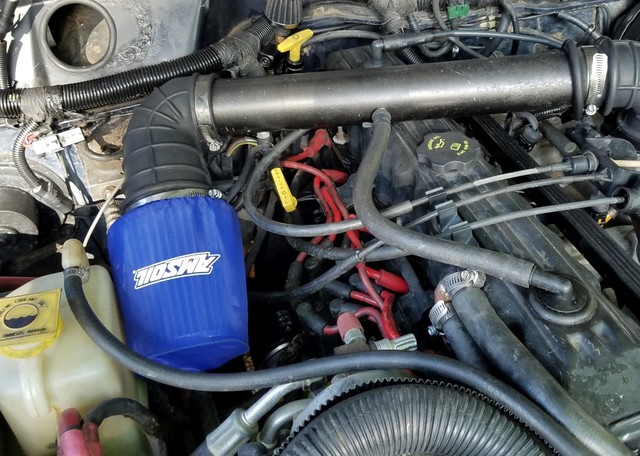
I also bought a new Amsoil filter and a dust-screen boot for it. I found that the ZJ 5.x elbow fit inside the opening better (hard to get them together). Hopefully no more dirt in the intake.
Overall performance is very good. Much more responsive throttle, and more even power. I am still in the break in period on the lifters so I am not running it very hard, but overall it feels very good.
I believe my temperature issues have also been resolved. Contributing factors were the cracked exhaust manifold, crap in the cat converter, dirty O2 sensor, and crap in the coolant passages. Probably a couple more things. I also cleaned and tightened the grounds in the engine bay so all the electronics up front should be happy. My gauges are still off, but I carry an IR gun and so far my temps are all perfect.
NACfest last weekend, I thought I would be able to drive up and back, maybe wheel the easy trails, but one of the calipers started smoking on the way out of town. I drove up in my DD and rode passenger for a day. Good times
304 stainless can get surface rust, there is much less nickel content than with 409, which is far more expensive. It still should hold up over time if put together correctly.
.....did you get time to drill down into that overheating problem yet? Looking back at our discussions, your problem sounds a lot like the one I experienced with my 89. It was good for short hops and slow running, but heated up rapidly after a half hour or so of highway driving. Turned out to be a faulty lockup solenoid in my case....
I have done a lot of testing. Last thing I did was move the winch solenoid box onto the side of the bumper to open up more radiator airflow. Also removed the shields from the trans and ps coolers. Seems to have made a significant difference on top of the other changes (cat converter, coolant flush, head work, etc). 95 degrees today with AC on full and it only got up to 219 / 220 at idle after running around town (per the infrared), that is good enough for me.
I put a temp gauge in the tranny and have been watching it. Trans eventually gets up to heat but it takes a long time, pretty obvious that the trans is not getting hot first. Overdrive is definitely slipping however, can feel it pretty clearly, so I bought a core and plan to do a full rebuild on that.
Spoke too soon. I drove in a long Jeep parade today and temps shot up on the highway again. I talked to a mechanic friend who suggested separating the engine and trans coolers to see which got hotter. Transmission is definitely the culprit--pegged the needle at 250F after a while.
Engine also gets warmer than it should (210-220), I suspect there is some crap in the radiator, same stuff that was in the head. I can deal with that part of it.
Check that torque converter lockup solenoid in overdrive. Mine wasn't locking, and it cooked everything like a southern barbeque. Time and heat soak, wasn't noticeable on the highway until it was too late, and even driving slow couldn't bring it back down. Thermal runaway
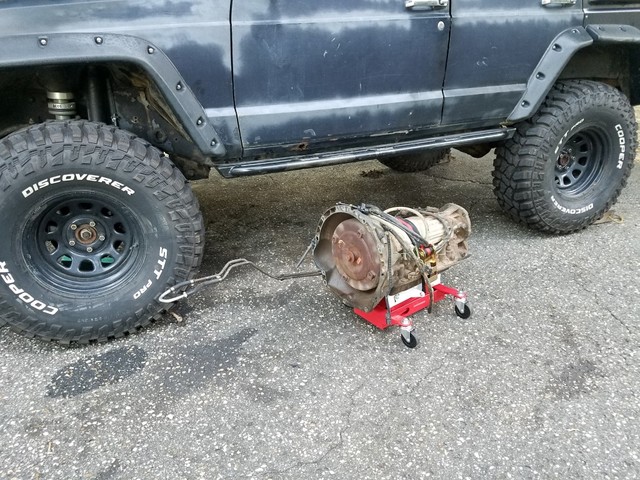
So... the current AW4 was a $250 junkyard trans that I swapped in on short notice when I did the engine swap nearly a decade ago, and nothing was ever done to it except a filter and fluid swap; I've actually been meaning to get it overhauled to start over with a clean slate and just never got around to it. Thinking about the history some more, I've been getting excess heat for a while now (last spring at least) and if it has been coming from the transmission then this one is probably blued internally (if not worse). I found another AW4 from a part-out for $200, and dropped it off at the transmission shop that rebuilt the 4T60 in my Cadillac, and am having them do an overhaul on that. Opportunity to do it right, and should be good for another long run of abuse after its done.
For the last couple of years I've had some pretty scary corrosion on some of the brake lines.
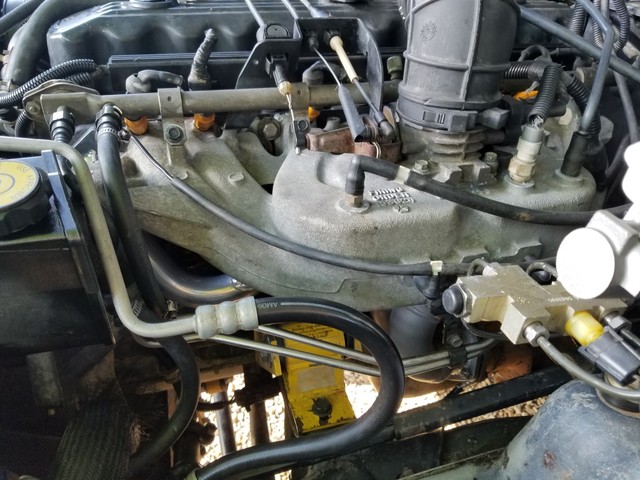
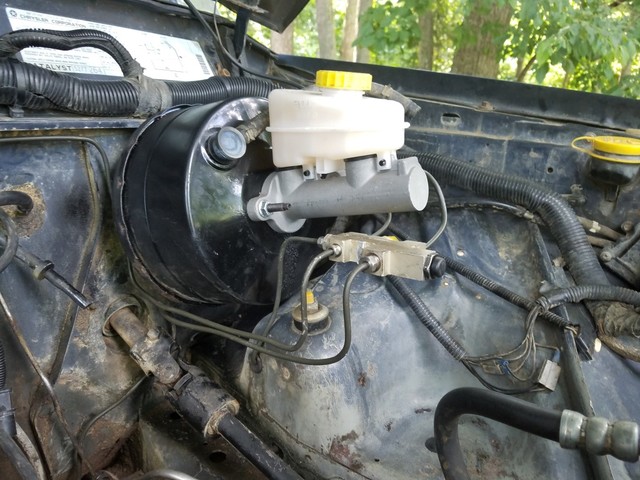
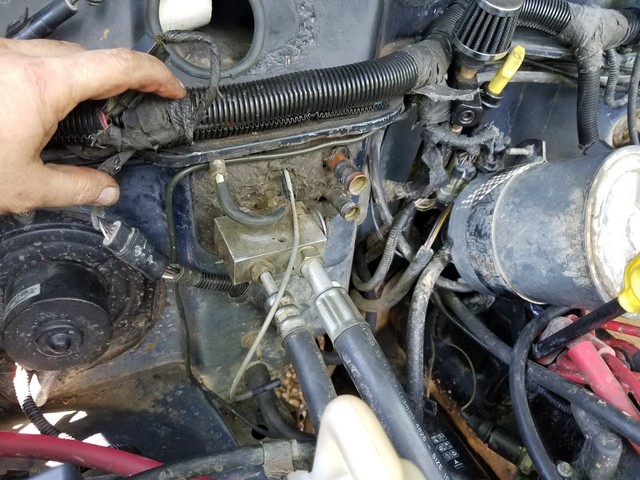
I slowly acquired a nice flaring tool, 20' of vinyl coated stainless steel 3/16" line, and an assortment of brake fittings, but did not have the downtime to really fix everything. Last month while the head and manifolds were removed, I was able to reach the hard lines on the firewall, so pretty good opportunity to finally do it. I decided to replace all the plumbing, so I also bought a new MC and found a good distribution block from a ZJ with discs at the junkyard.
I changed the routing a bit as you can see above. This kind of gets everything tight together and frees up a little space. New line to the rear junction goes around the intermediate steering shaft and down. Also changed the routing where the front passenger hard line comes down so that it would be easier to service / patch if ever necessary -- over the expansion valve, and down behind and under the evap canister.
Front lines are protected by the shock absorbers. The stock routing puts them right by the tires and they were getting destroyed by the MTs knobbies.
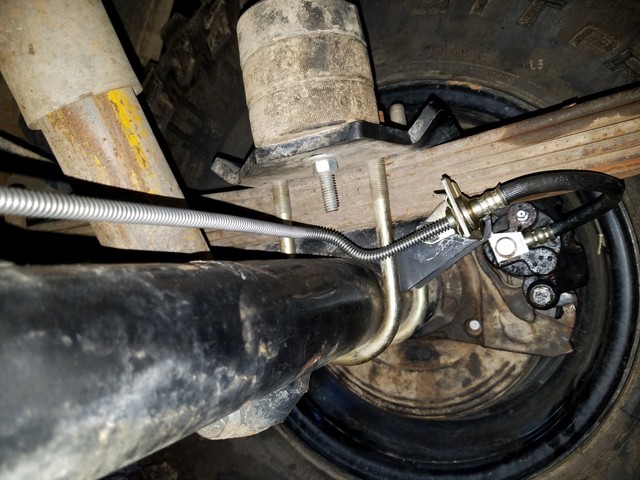
The rear axle is from a TJ D44 that was originally setup with discs, and uses small sections of hose that are permanently attached to the hard line, and mounting tabs that are screwed to the housing. When I converted the axle to leafs, I had to cut the little ears off the housing to make room for the perches. For the upgrade I decided to use the stock lines, and to drill and tap the perches to hold the mounting tabs. This puts the soft line right next to the caliper.
The calipers themselves had already been serviced recently--the rears were installed during the actual axle install, and the fronts were replaced a couple of weeks ago when they started dragging / smoking. So with this work, every inch of brake hydraulic has been replaced this year.
Very nice. My 01 has a lot of rust on the hard lines, that may be in my future as well, since I'm doing a rear disc conversion. Can't wait to have good brakes again!
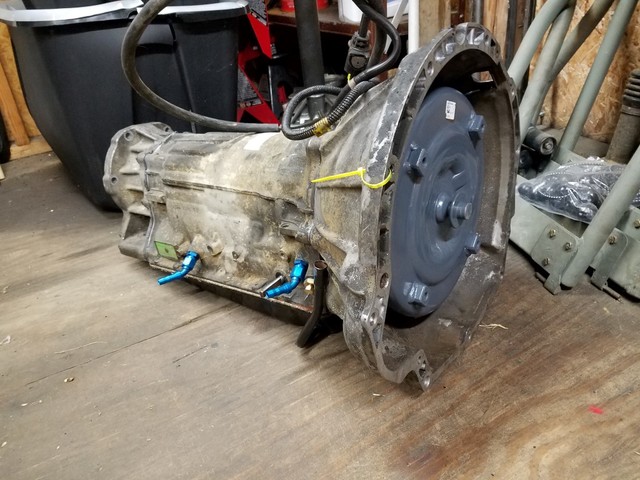
I got the replacement AW4 back a couple of weeks ago. New clutches, seals, gaskets, solenoids, torque converter, and a few more bits. I also had the shop install a Transgo SK-340 shift kit (the light duty one), so I could get some tighter shifts but nothing harsh.
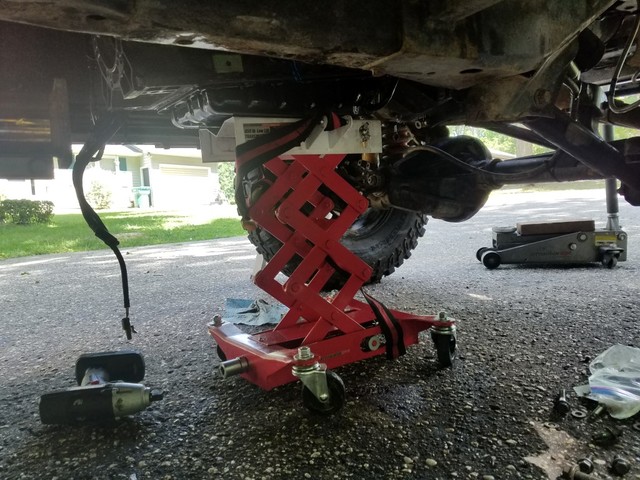
HF screw-drive trans jack made the swap easy
Replaced the freeze plugs in the block while it was out. All the freeze plugs are new now
Putting the new one in
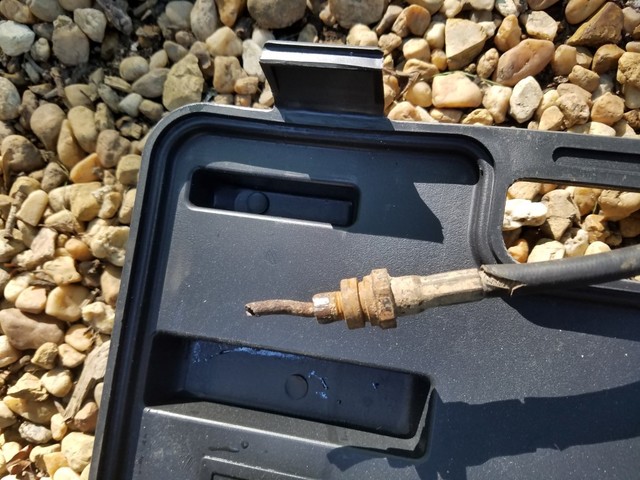
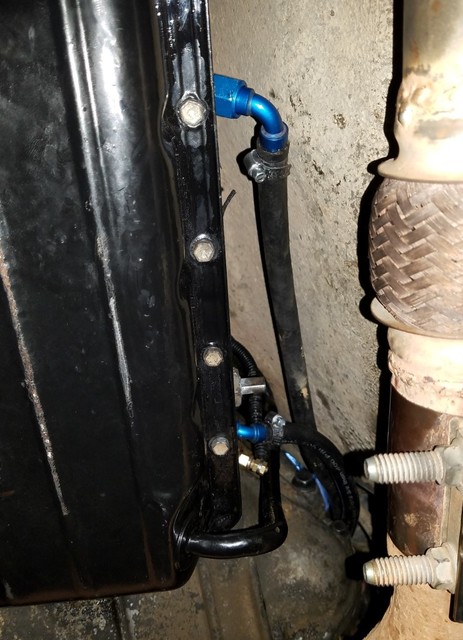
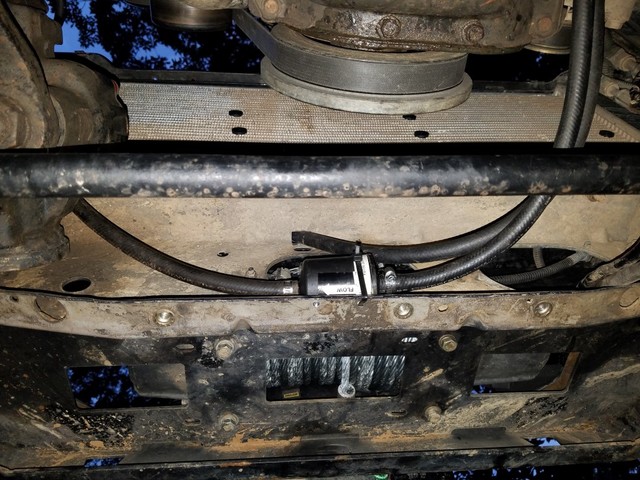
POR-15 on the pan, M14-to-AN6-to-3/8 barbed adapters (45 degree on the front, 90 degree on the rear), and the temperature sensor in the stock Toyota location
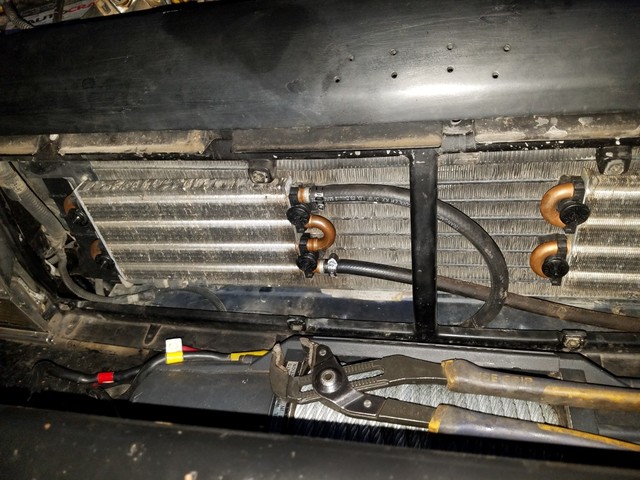
Wix 58953 filter on the cooler supply going to the lower radiator port, then fluid pushes out the top to a large tube and fin air cooler on the front.
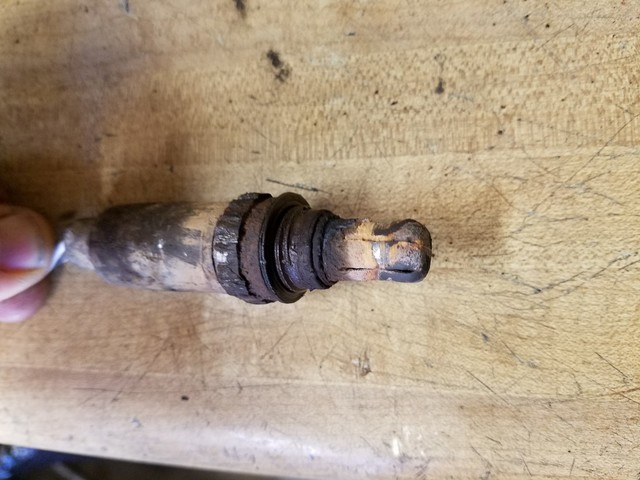
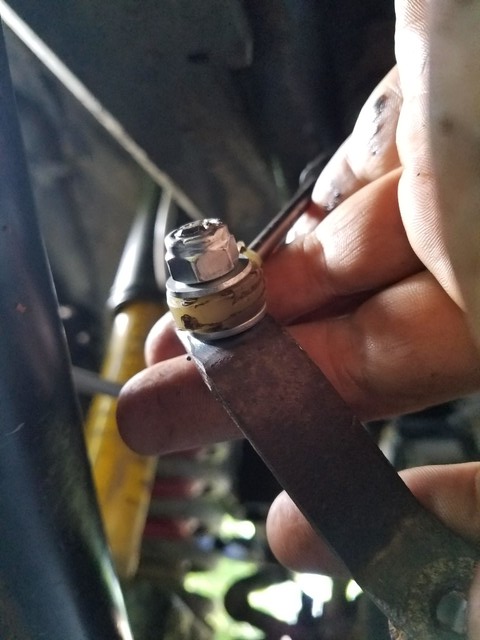
The nylon end of the shifter linkage cable lost tension. I cut and drilled the little ball from the tab and welded on a bolt. Then I snapped off the little wing pieces from the cable end and drilled it to match the bolt, and used a nylon lock nut to secure it in place but keep it loose enough to rotate instead of bind. I have a similar setup on my Cadillac--works better than stock and I don't have to replace the cable.
Starter decided it didn't like being moved, so I had to replace that too.
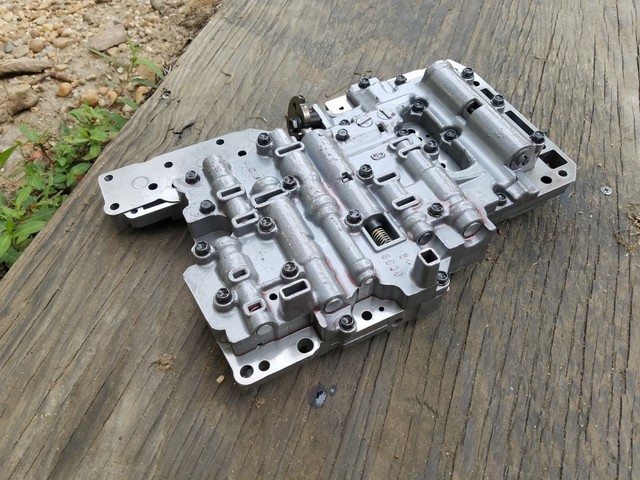
Finally got on the road and started having problems with 1-2 shifts and downshifts. The electronics appeared to be fine, so took it back to the trans shop. They took the valve body from my old trans and swapped it in to the new one, problem fixed.
So with all that done I now have a freshly rebuilt AW4 and it is working pretty well. Radiator fluid temps have dropped from 250 within a few miles down to a peak of 210 after wheeling all day, so that is good. I found about half-a-teaspoon of non-magnetic fiber matter in the pan of my old transmission too, so it was obviously starting to go.
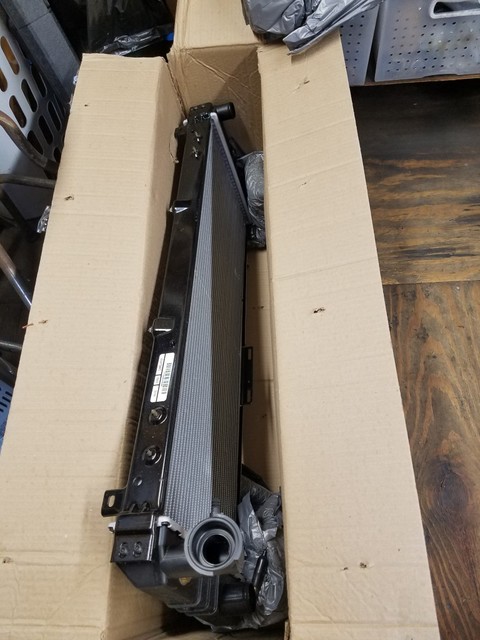
Engine temps still stayed high after the transmission swap so I did some deeper digging. Finally figured out there was a big cold spot in the lower half of the radiator (had to bring the engine to operating temperature in idle to detect--driving it caused the trans cooler to corrupt my readings). Bought a new Mopar 52080104AC dual-core radiator from rockauto and problem was solved.
Kind of pissed because I bought and installed that same thing around Christmas, but then developed a heater core leak and dumped some K-Seal to buy some time. Sure enough that shit clogged up my radiator. Pissed because the heater core started leaking again anyway, so it didn't even buy me any time there.
Anyway the Jeep is back in action. I went to some property in VA leased by a club I'm in and got to do some light wheeling. About 3 hours each way plus some wheeling in the middle, and no real problems--trans is running a little hotter than I'd like so I may try to find stacked plate coolers again (couldn't find any that were the right shape last time).
I hope to do some more wheeling this weekend coming up as well, but need to do a little more cleanup work.
Got the last bug with my transmission ironed out, so went wheeling for real at one of Big Dog's events at the Cove Campground in Gore, VA. Trans got hot on the trails but with both electric fans running I could keep it under control pretty well. Need to get a stacked plate cooler to improve performance.
Also need to work on my suspension mods some more from where I left off. Uptravel flex is good (absolutely lurv the Prothanes), but downtravel is still restricted by the control arms hitting the coil buckets. Once things settle down a bit I will look at long arms. I am very excited about the Ironman 4x4 longarm bellypan, might try to get that and some arms with the Metalclock Duroflex joints.
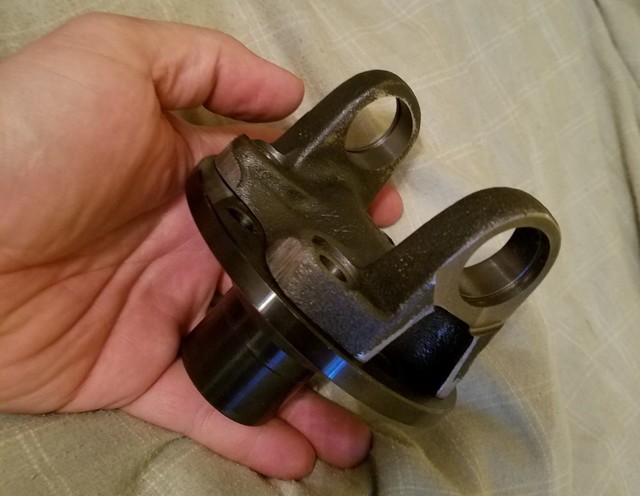
Also broke my rear D44 1330 yoke, working on a replacement at the moment.
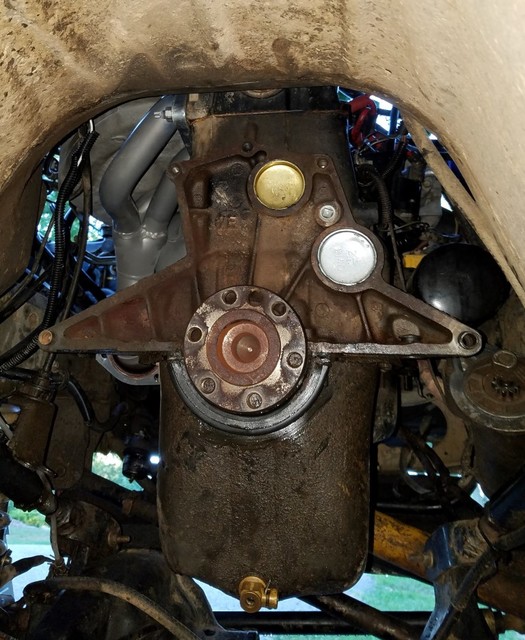
The TJ Rubicon D44s came with 1330 yokes, which are bigger than the 1310 yokes. Ironically the larger size means they hit rocks more often, so in this case bigger is worse. When I first got the axles I had planned to replace the yokes with flanges for added strength and protection. Looking around I could not find anything off the shelf, so I dug in and figured out a recipe from Toyota conversion parts.
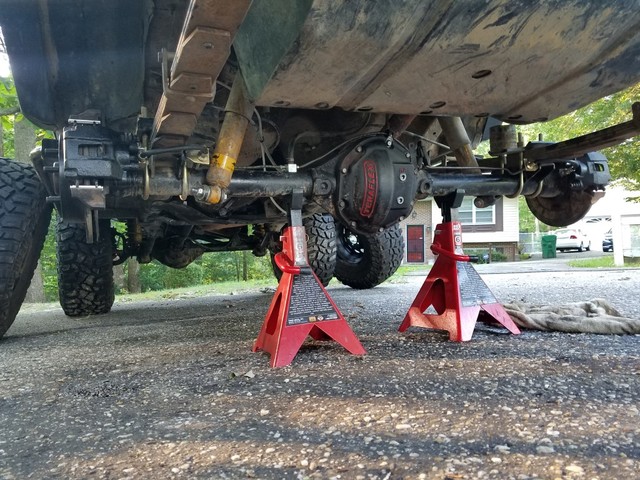
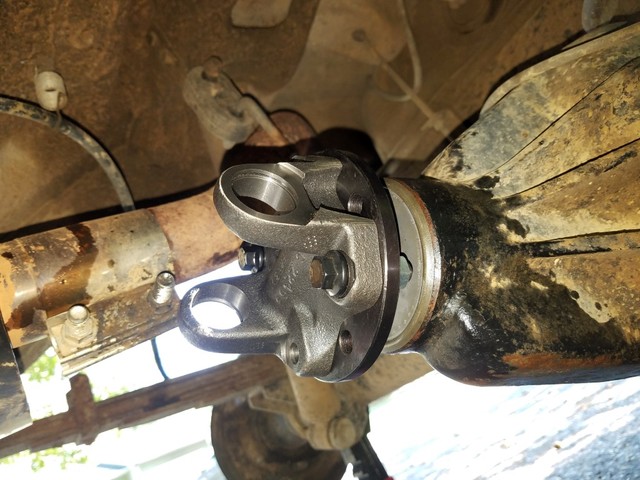
The axles are shimmed instead of sleeved, so just had to tighten it down with the cheapo cordless impact and it held torque to 175. Also replaced the seal while I was at it.
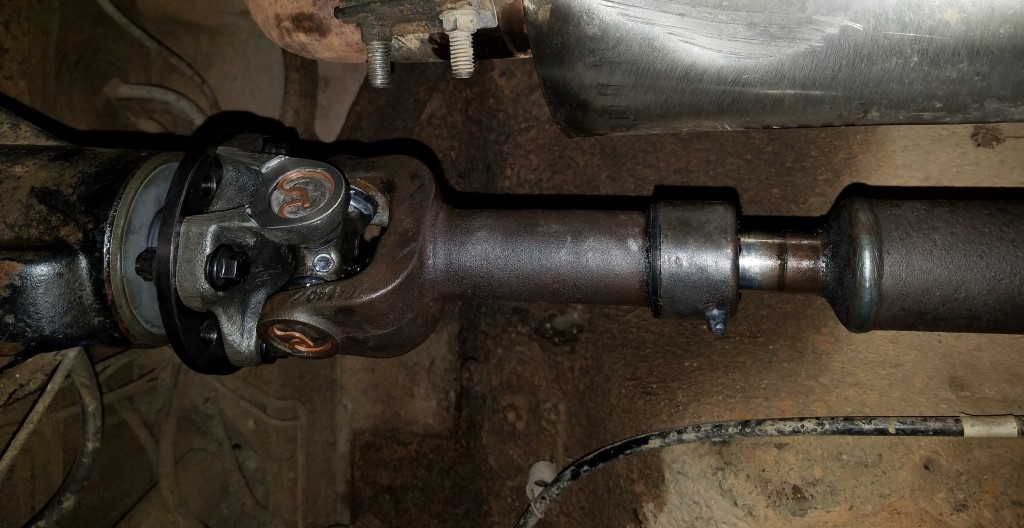
Eye to eye was about 32" which is just about the same length as my WJ shafts at compression (too long). I found a couple of XJ AW4 front driveshafts (30.66") and they work perfect.
I bought two shafts so that I have a spare for my next wheeling trip. Need to rebuild the centering joint on one of them, otherwise seems to be working alright. I have another pair ready to install in the front, but I have some other stuff going on that I need to finish up.
ps--the AA flange is supposed to be the same for D30 / D35 / D44 (non JK).
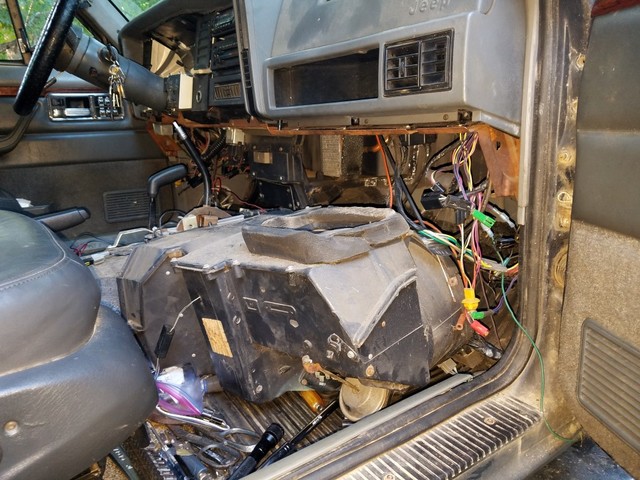
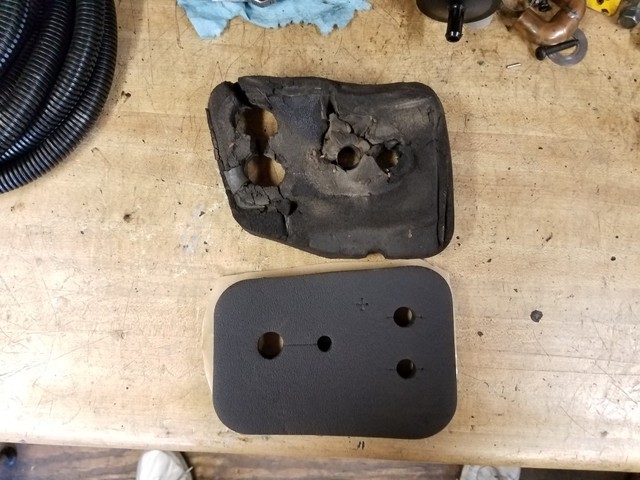
Back in the spring the heater core started leaking, and I blocked it off until I could get some other stuff done. Its starting to get cool now so time to replace it. I used the technique described in the FSM, which is to remove the lower dash and the passenger-side support bolt, then lift the upper dash out of the way. Pretty simple operation.
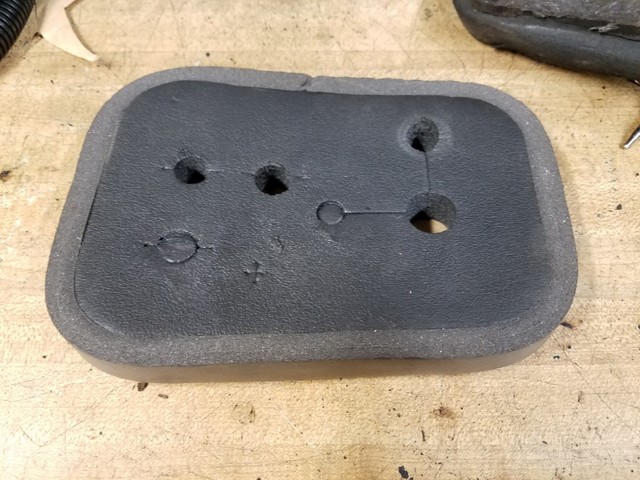
The foam block at the firewall was pretty much destroyed, so I looked around for replacement pieces. I found the 97+ foam kit and thought I would try it--the round piece for the blower motor is too big (could be trimmed to fit but not necessary), and the square piece at the firewall has the wrong hole pattern (easy to fix).
Added a some 1" foam from Lowes around the edge, filled the unused holes, and cut new ones where needed
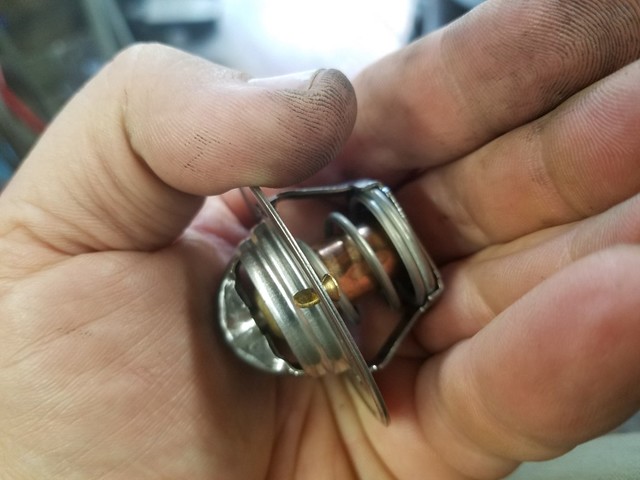
I had drilled a bleed hole in my Stant thermostat while chasing down an overheat problem, so I wanted to replace it (bleeder just makes them take longer to warm up, in my experience). I found that 2000+ Jeeps have a slightly different thermostat with a rattle bleeder valve, part number 52028186AC. Basically it lets air out when its sitting but the valve closes when the water pump starts pushing coolant through the head.
Also addressed some minor electrical problems but nothing really to show for that.
Since I had to evacuate the refrigerant to pull the core, I am also looking at some upgrade options on the HVAC system. Weather will be cool for a while so not a big hurry.
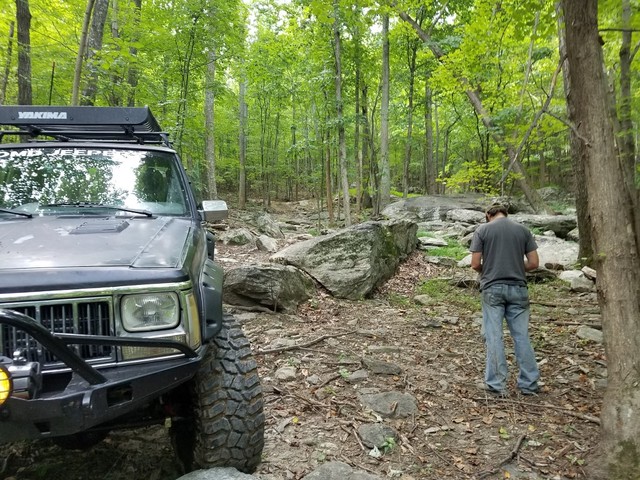
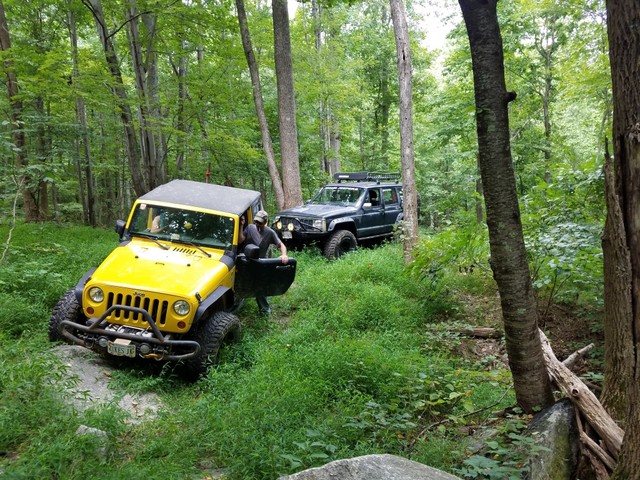
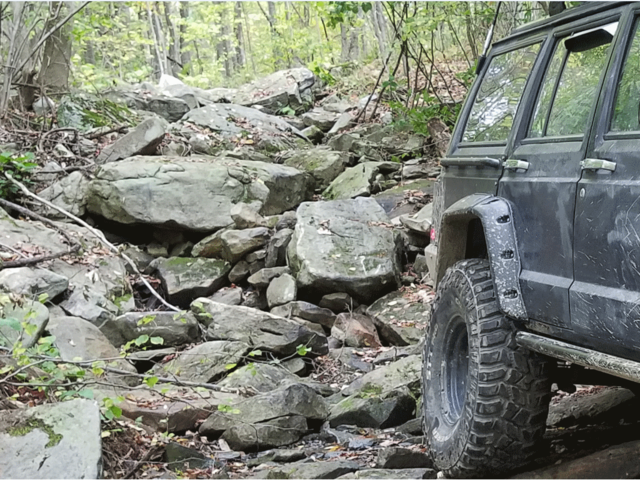
Went to Rock Run Recreation Area in Patton PA (near Altoona) with some friends over the weekend. Jeep worked great on the long drive so summer fixes all seem to be holding. Wheeled one obstacle
Somewhere near the bottom, the front left RCV separated at the CV joint and I lost all power to the wheel. It looks like the PO "forgot" to install the snap ring in the CV in the last rebuild, and my locker doesn't have any kind of blockage that would prevent the shaft from walking all the way out of the CV. Trip was over. Working on rebuilding them now.
Had a few other small problems too, all fixable.
One other thing that keeps coming up is that my roof basket shifts around when I am wheeling hard. It started the trip in the middle, ended up all the way over on the passenger side. Seems the Yakima is really just a fancy car luggage rack and I need an off-road rack instead. I will probably start looking for one that will act as the beginning of an exo.